I have been bored because of this COVID-19 quarantine stuff so I started to take apart my cub and replace a few parts, and then I thought " hey might as well take it all apart and at least paint the front two thirds of it" so I am maybe a 1/4 of the way done
a few of the parts I plan to replace I may have missed a few if there is anything else you think I should look at or replace let me know!
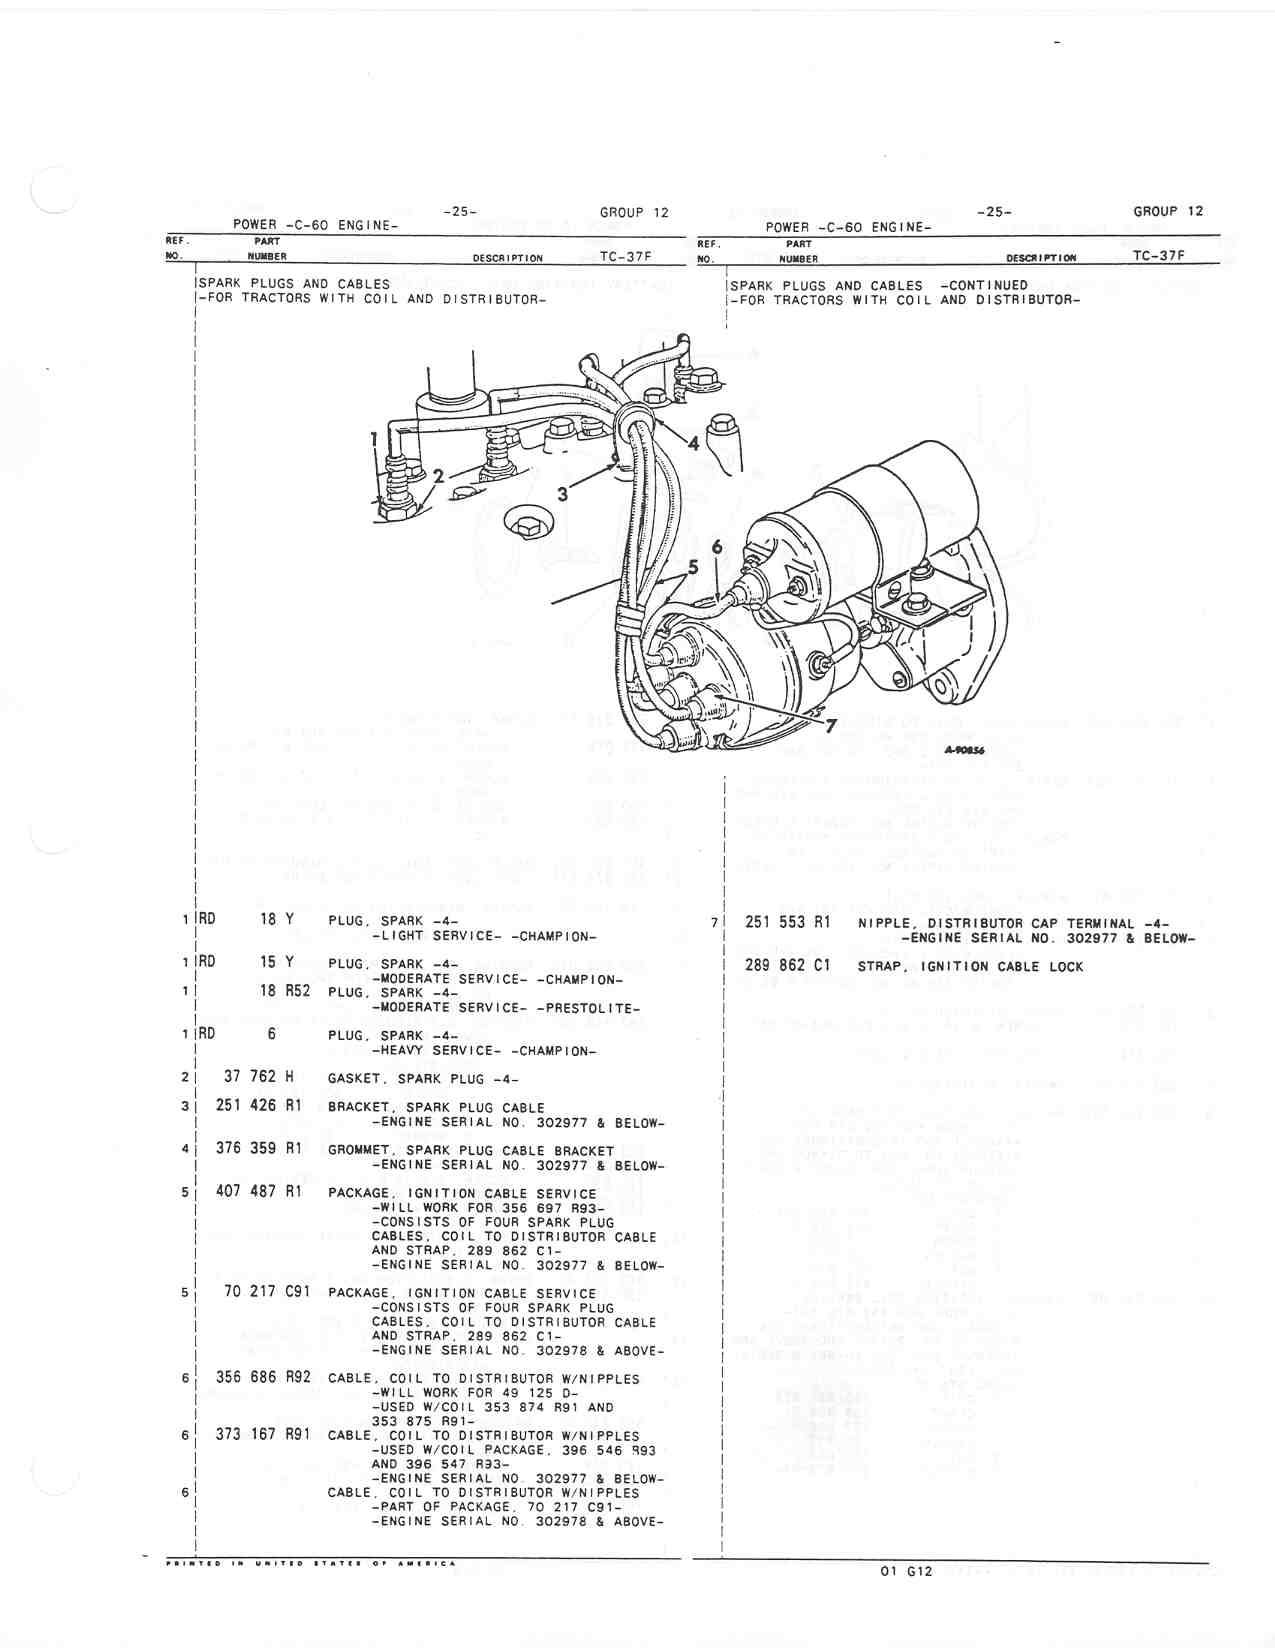
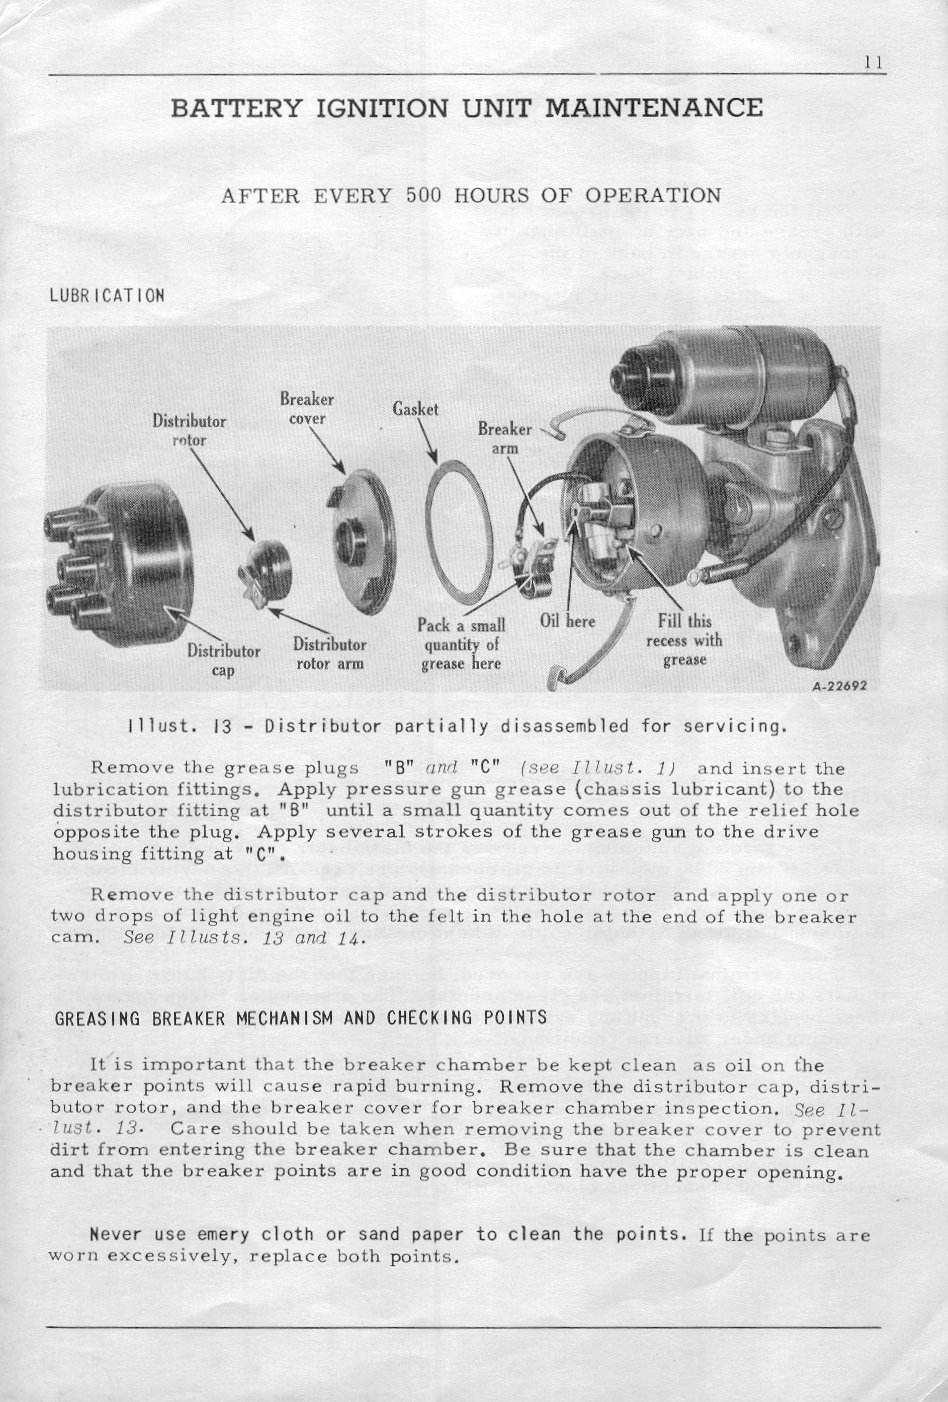
- parts for a full tune-up
-rear main seal
-oil pan seal
-tappet cover seal
-bell housing
- rebuilding carb
- new exhaust pipe (vertical, and already removed old just have to chase the threads)
- oil pressure gauge
- clutch & throw out bearing
P.S something interesting is that the last time this tractor had a tune up was in 1969 my grandpa did a tune up and rebuilt the engine so yes those spark pugs are from 1969.
The notes in the operators manual from my grandpa say:
Bought tractor Sept 25 1968
Generator rebuilt Nov. 15 1968
Starter new brushes and bushings Nov. 15 1968
Rebuilt Motor Nov 15 1969
Reground Crank, New Pistons & Rings (.030) Rist Pin
Valve Job Mains .010 Rods .020


/Group%20-%2012%20-%20Power%20-%20C-60%20Engine/Page-05.jpg)