Another issue is that there are differences in thickness of the replacement seals. Earl's seal setter with the adaptor ring can set either thickness of seal.
These tools are a great value for the price.
This site uses cookies to maintain login information on FarmallCub.Com. Click the X in the banner upper right corner to close this notice. For more information on our privacy policy, visit this link: Privacy Policy
NEW REGISTERED MEMBERS: Be sure to check your SPAM/JUNK folders for the activation email.
Mag oil seal n stall question
Forum rules
Notice: For sale and wanted posts are not allowed in this forum. Please use our free classifieds or one of our site sponsors for your tractor and parts needs.
Notice: For sale and wanted posts are not allowed in this forum. Please use our free classifieds or one of our site sponsors for your tractor and parts needs.
-
Bigdog

- Team Cub Mentor

- Posts: 24144
- Joined: Sun Feb 02, 2003 12:50 pm
- Zip Code: 43113
- Circle of Safety: Y
- Location: OH, Circleville
- Contact:
Re: Mag oil seal n stall question
Bigdog
If you can't fix it with a hammer, you've got an electrical problem.
My wife says I don't listen to her. - - - - - - - - Or something like that!

http://www.cubtug.com
If you can't fix it with a hammer, you've got an electrical problem.
My wife says I don't listen to her. - - - - - - - - Or something like that!
http://www.cubtug.com
-
RaymondDurban

- Cub Pro

- Posts: 4435
- Joined: Wed Dec 26, 2007 7:45 pm
- Zip Code: 32536
- Circle of Safety: Y
- Location: FL, Crestview
Re: Mag oil seal n stall question
Bigdog, I understand the different thicknesses of replacement seals, but is the lip not in the same place?
Screwstick #3934
FCub - LoBoy - Numbered Series - Power Unit Databases
FCub - LoBoy - Numbered Series - Power Unit Databases
-
Criswell
- 10+ Years

- Posts: 203
- Joined: Thu Sep 29, 2011 3:17 pm
- Zip Code: 48180
- Tractors Owned: 1952 Cub with
- 54 Blade
- 193 Moldboard Plow
- Woods 59 C-2 mower
Re: Mag oil seal n stall question
Here is the "tool" that I had made to install the oil seal. First start with governor base that is worn out and past its useful life. The one pictured below has had the machined surfeace where the weight carrier rides worn down in excess of 0.040"

Next, remove the oil baffle on the back of the governor base that would direct the oil inot the hole in the base/bushing. Just a couple of minutes with the bench grinder and then about 5-10 minutes with a file to clean it up. The baffle has been grond and filed flush to the back of the governor base. Removing the baffel will allow the "tool" to clear the ID of the new seal.

Next, using a 2" 5/8-11 bolt, 2 jam nuts, 1 washer and some permanent Loctite (red) and you have the tool assembled and ready to go.

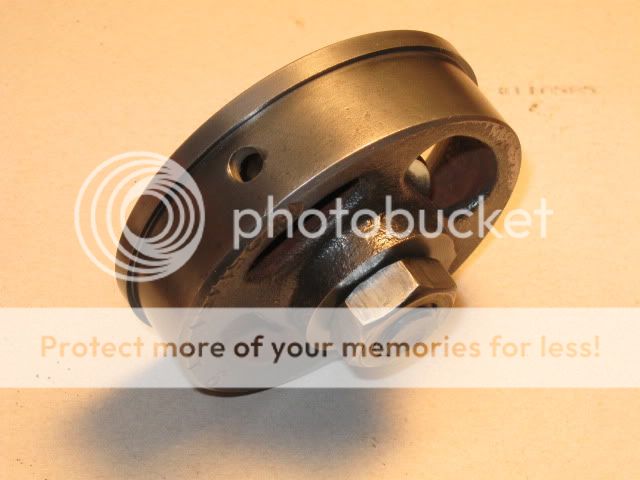
The governor base is the correct diameter and it also has a lip on it it to stop it at the proper depth. The worn out governor base was already on hand and the bolt, washer and nuts cost $1.00, so all-in-all it is a relatively cheap and easy tool to make that works very well.
Next, remove the oil baffle on the back of the governor base that would direct the oil inot the hole in the base/bushing. Just a couple of minutes with the bench grinder and then about 5-10 minutes with a file to clean it up. The baffle has been grond and filed flush to the back of the governor base. Removing the baffel will allow the "tool" to clear the ID of the new seal.
Next, using a 2" 5/8-11 bolt, 2 jam nuts, 1 washer and some permanent Loctite (red) and you have the tool assembled and ready to go.
The governor base is the correct diameter and it also has a lip on it it to stop it at the proper depth. The worn out governor base was already on hand and the bolt, washer and nuts cost $1.00, so all-in-all it is a relatively cheap and easy tool to make that works very well.
Where you are, right now, is of absolutly no use unless you are able to get away from it, FAST!
Who is online
Users browsing this forum: No registered users and 45 guests


