Page 8 of 28
Re: My FCUB Wind Chime!
Posted: Wed Jul 03, 2013 6:53 am
by CPIII
Painting seems to be coming along nicely....Good job!
What type of airplane does that wing belong to? Looks like you were into the real R/C side of things ....buy a kit ...you get a bunch of sticks in a box.....and wha lah! a month or so later you have a plane. I have been out of the hobby a while also. Wanting to get back to at least the building part though...but it is getting harder to find the old kits.
Re: My FCUB Wind Chime!
Posted: Wed Jul 03, 2013 7:37 am
by PVF1799
CPIII wrote:Painting seems to be coming along nicely....Good job!
What type of airplane does that wing belong to? Looks like you were into the real R/C side of things ....buy a kit ...you get a bunch of sticks in a box.....and wha lah! a month or so later you have a plane. I have been out of the hobby a while also. Wanting to get back to at least the building part though...but it is getting harder to find the old kits.
Posted a reply in off-topic on the airplane wing. Thanks for the comments on my painting.
Re: My FCUB Wind Chime!
Posted: Wed Jul 03, 2013 9:36 am
by Hengy
This thread just proves that you have to be careful what is in the background of your pics! I guess I am not a "background" kind of guy...completely missed most of the stuff guys posted about until they pointed it out!
Paint looks good, man!
Mike
Re: Welding Practice
Posted: Wed Jul 03, 2013 8:45 pm
by Rudi
Dan:
If you can get a night class it will be well worth whatever it costs. I know that my class was worth every penny and it paid for itself in just a few projects that I was able to do myself properly. I still have lots of projects I want to do and I hope to do them this summer.
If anyone else is contemplating it and putting it off, suggest you don't. Tomorrow never comes until it is almost too late to play.
Re: Welding Practice
Posted: Thu Jul 04, 2013 11:24 pm
by clodhopper
That appears to be the shaft from the governor linkage to the carb. Mine was shot at that same location. I had some 3/16 steel rod on hand. Rod that small can easily be fabbed without heat. I made new linkage, choke rod and starter rod from it.
viewtopic.php?f=1&t=73999&hilit=+choke
Re: Welding Practice
Posted: Fri Jul 05, 2013 6:17 am
by PVF1799
clodhopper wrote:That appears to be the shaft from the governor linkage to the carb. Mine was shot at that same location. I had some 3/16 steel rod on hand. Rod that small can easily be fabbed without heat. I made new linkage, choke rod and starter rod from it.
viewtopic.php?f=1&t=73999&hilit=+choke
Howdy, this is the detent lever of for the manual lift, considerably bigger than 3/16". Thanks for sharing how you made the governor linkage. Go information to know.
Ken
Re: Welding Practice
Posted: Fri Jul 05, 2013 7:29 am
by Scrivet
PVF1799 wrote:......... this is the detent lever of for the manual lift, considerably bigger than 3/16". .............
I was wondering what it was. I didn't recognize it and you never said. Nothing in the picture for scale, kind of rough to make an ID from just a hook, I'm impressed that several did. I'm also impressed with your welding, good job!
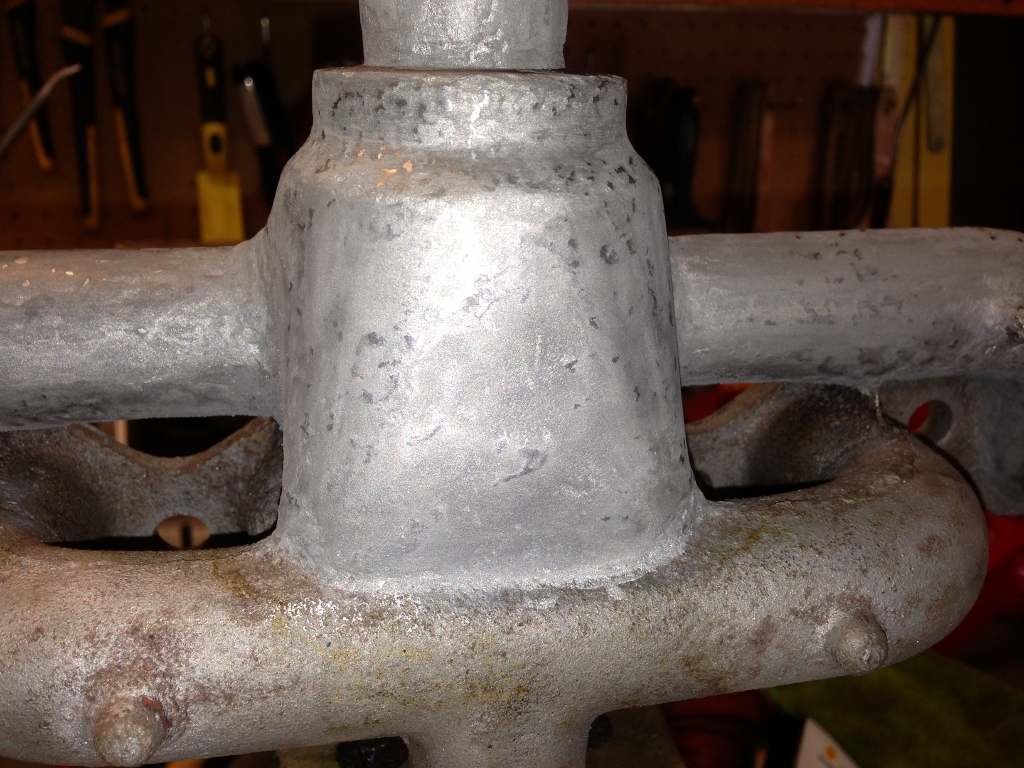
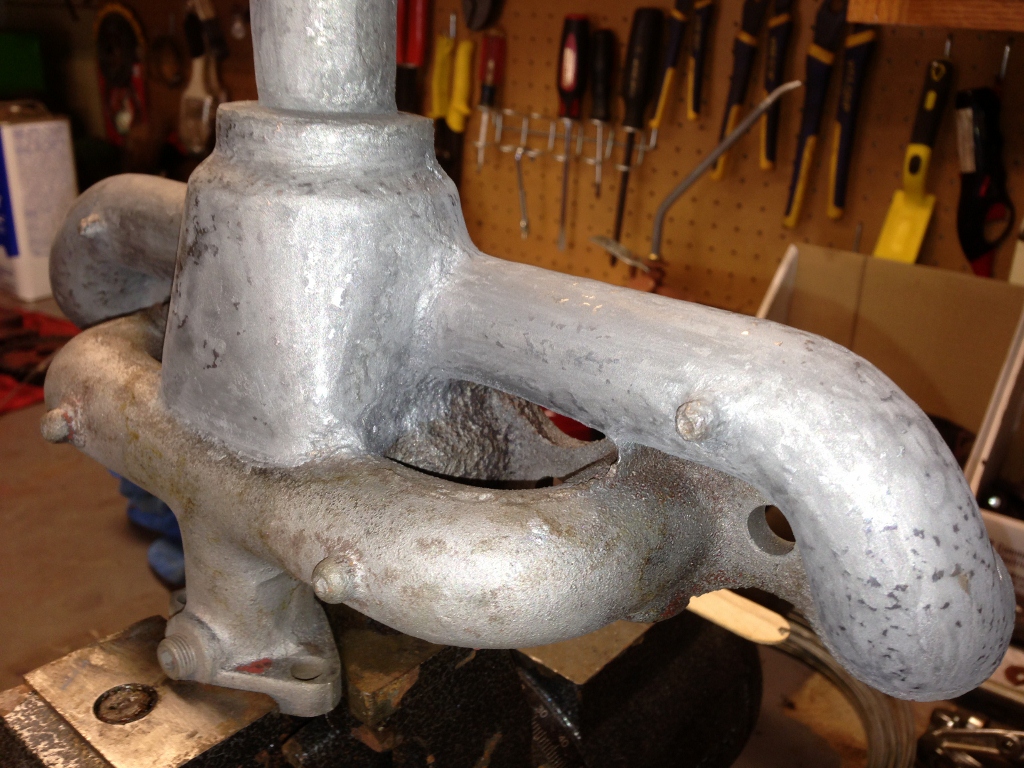
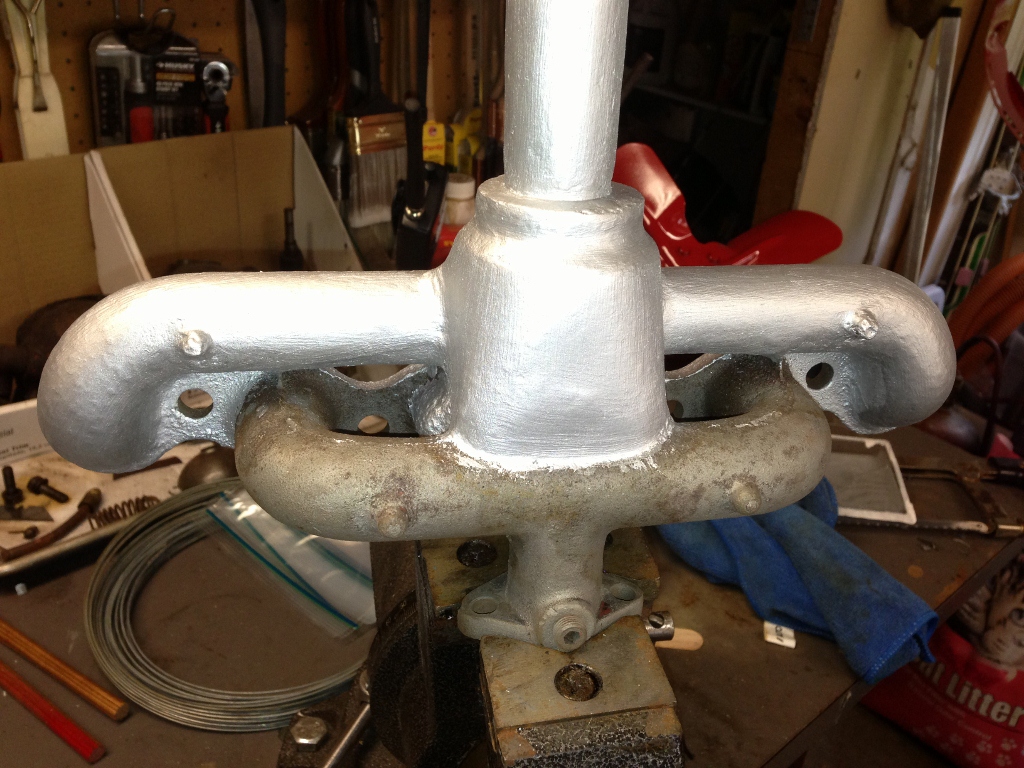
Manifold Restoration
Posted: Fri Jul 05, 2013 9:48 am
by PVF1799
Hi all - Here are the pictures and description for the manifold restoration I just finished. Red Paint on Intake Manifold will complete the job.
1. Sand Blast Entire Manifold.
2. Knocked the obvious high spots off with a hand file
3. Used Fire Seal 2000 to fill the exhaust manifold pitting. - Many coats with a lot of sanding and filing in between
4. Baked it my wife's oven while she was at work - Regrettably the smell still lingered in the house when she got home from work

5. Two Coats of Por 20 Aluminum Paint. Now Drying - WIll be baked for cure next week - While Pat is at work
Pretty Happy with how it turned out. Total time 2-4 hours total time over the course of 2 weeks.
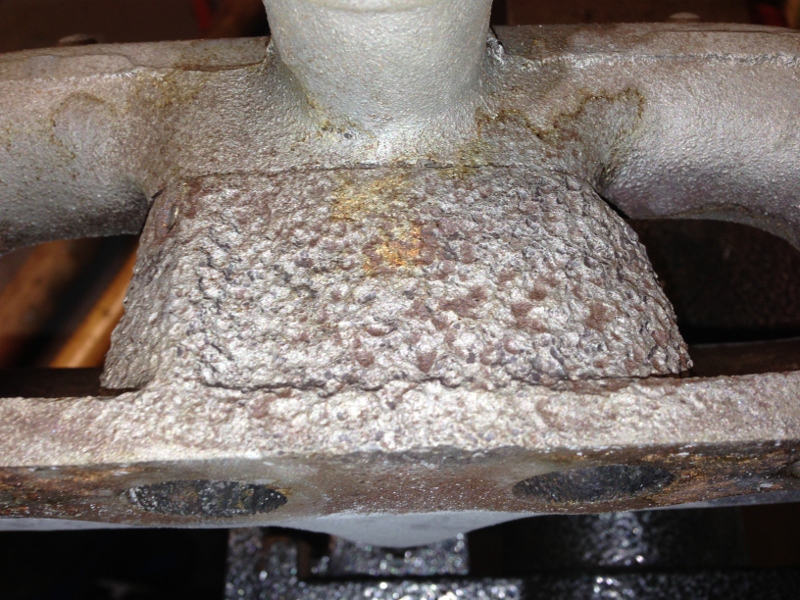
- The Whole Exhaust Manifold Looked Like This.
- IMG_2294 (800x600).jpg (348.23 KiB) Viewed 293 times
- After Filling, Filing and Sanding _1
- IMG_2295 (1024x768).jpg (487.44 KiB) Viewed 293 times
- After Filling, Filing and Sanding _2
- IMG_2296 (1024x768).jpg (449.81 KiB) Viewed 293 times
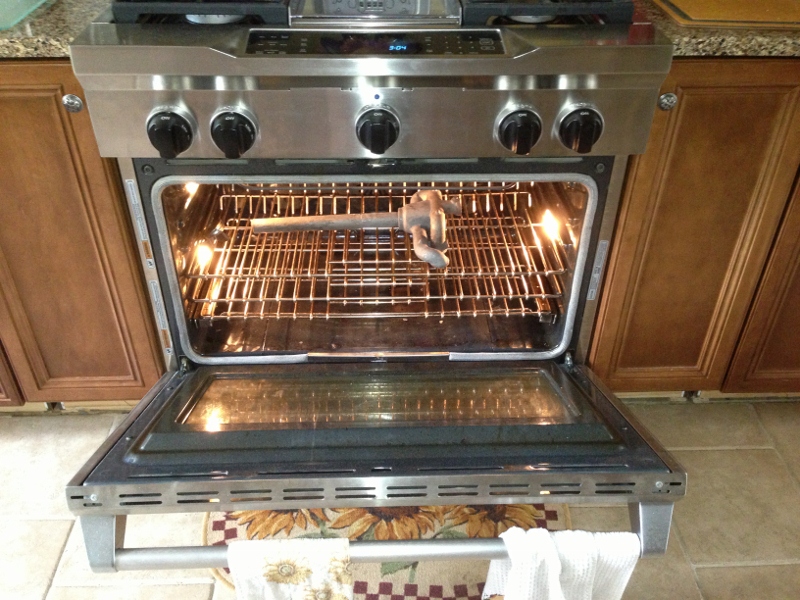
- Ready for Convection Bake _ 1 @ 325F for 1 hour
- IMG_2298 (800x600).jpg (316.17 KiB) Viewed 293 times
- Finished View _ 1
- IMG_2305 (1024x768).jpg (444.54 KiB) Viewed 293 times
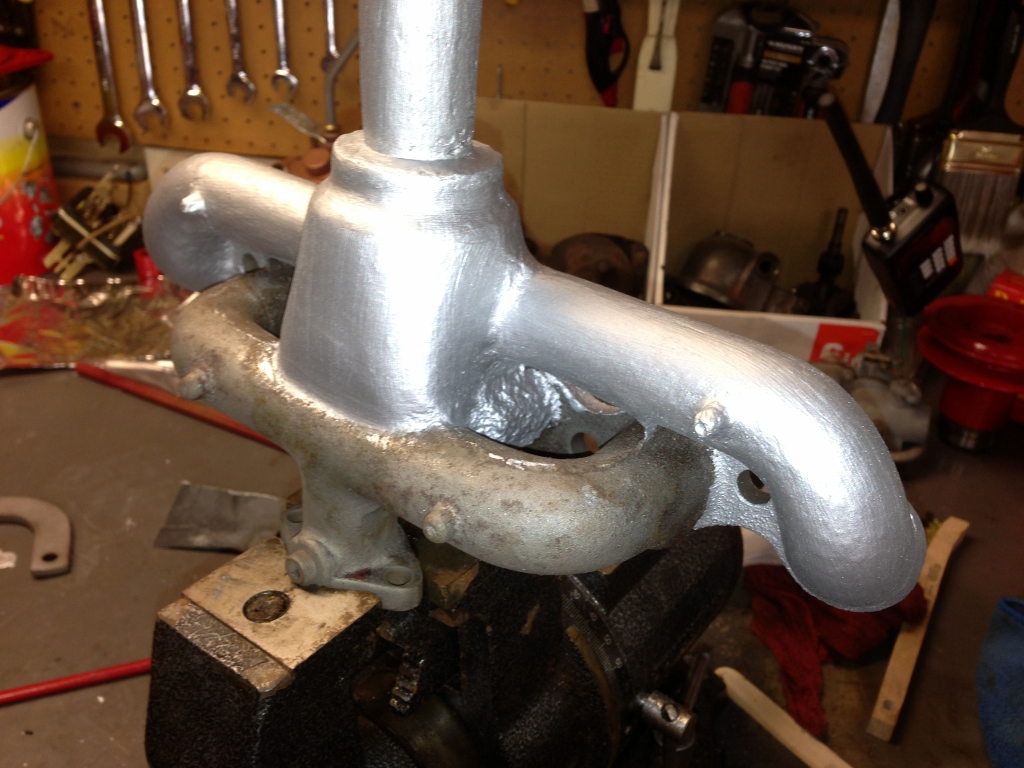
- Finished View _ 2
- IMG_2306 (1024x768).jpg (384.76 KiB) Viewed 293 times
Re: Manifold Restoration
Posted: Fri Jul 05, 2013 12:42 pm
by Rudi
Ken:
Looks really nice
You are a very brave man

If I had used Em's new oven to bake a manifold -- well I wouldn't be able to respond to this thread .. for a very long time

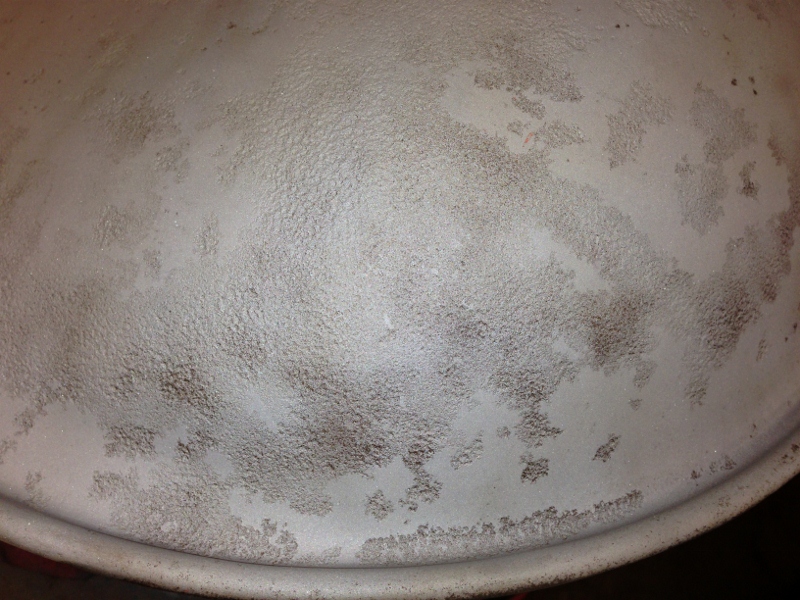
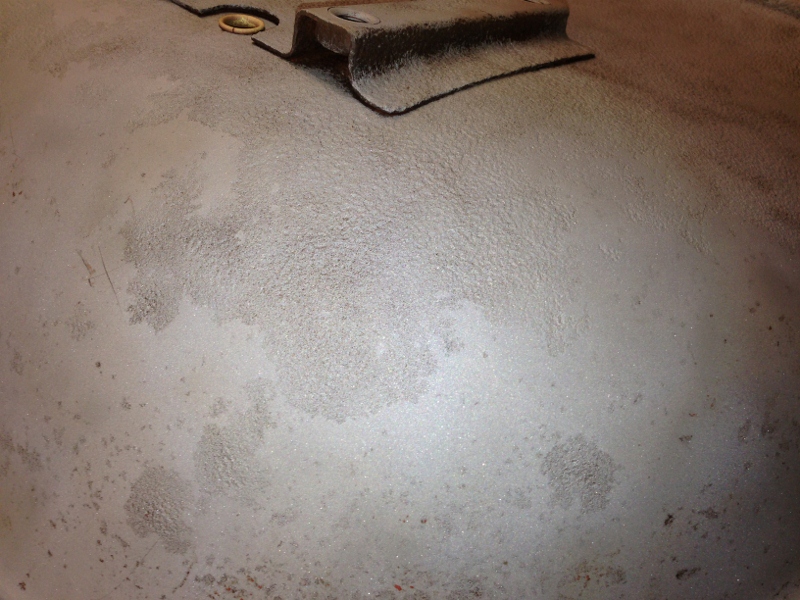
Seat and Hood Restoration - Now w/Pics
Posted: Mon Jul 08, 2013 8:45 pm
by PVF1799
Many of you provided great advice when I posted about filling the pits in the hood and on the bottom of the seat. You'll recall, that I'd never used filler before so I practiced on the bottom of the seat. I wanted to share here what I learned and now have practiced to a very nice result.
1. The filler I'm using from tptools.com, states 20 minutes to sand - Someone posted here, that's too soon and you'll just plug your pads - wait 24hrs minimum. Confirmed. If you sand before that it plugs the pads and takes too much out of the pits.
2. I was using a sanding block w/80 grit. The posts advised 120 or higher - Confirmed. The result achieved is much better w/less recoats required.
3. Use a Dual Action Sander - Confirmed - I have two now a 6" palm and a 3" pistol grip both with 2.5mm orbits for finish sanding. The results are incredible.
4. Curing time of the filler - Use Less Hardener - Confirmed - It seemed obvious, but felt I was scaling down correctly from the mfg's recommendations.
The seat bottom is now smooth as a babies bottom. The hood is in process but the areas complete are like glass - no pits to be found.
This post bears solid testament to the value of this forum. Thanks all.
- Seat Before
- IMG_2272 (800x600).jpg (301.42 KiB) Viewed 456 times
- Seat Before_1
- IMG_2274 (800x600).jpg (281.01 KiB) Viewed 456 times
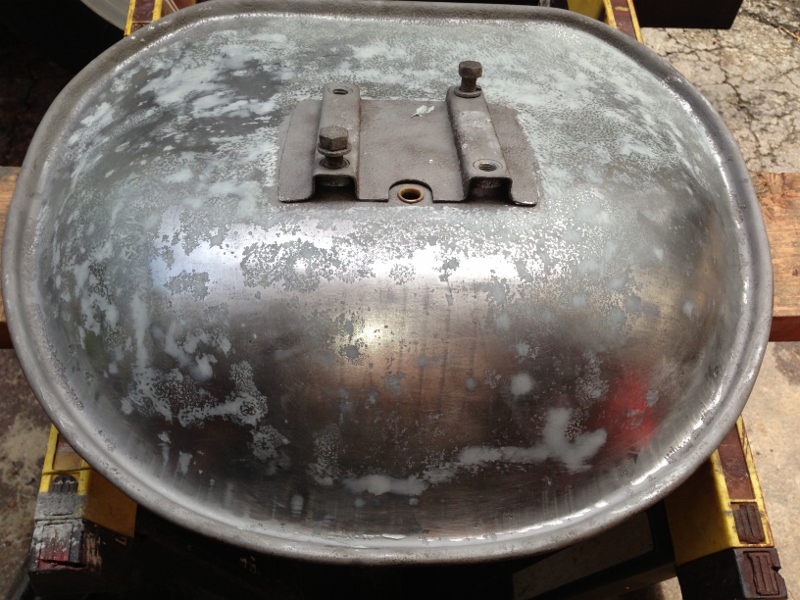
- Seat After
- IMG_2327 (800x600).jpg (302.91 KiB) Viewed 456 times
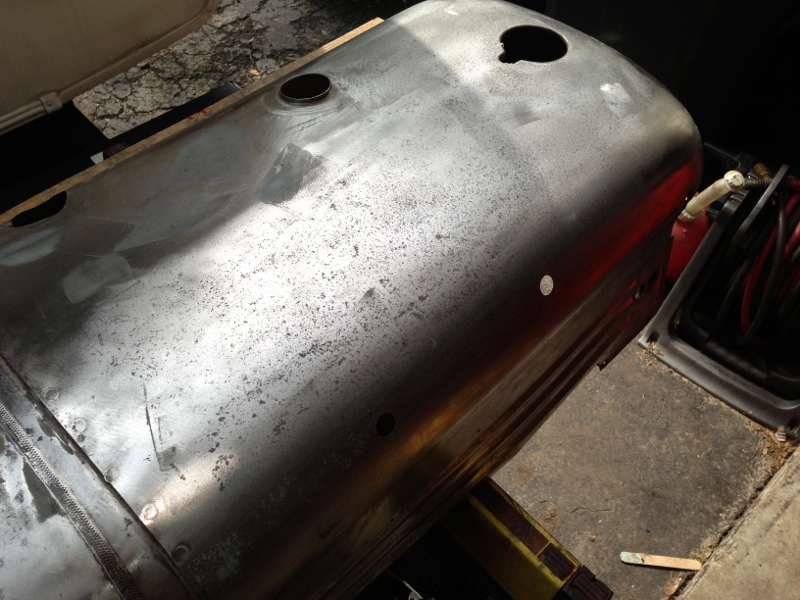
- Hood Filled and Sanded - Very Smooth
- IMG_2328 (800x600).jpg (275.61 KiB) Viewed 456 times
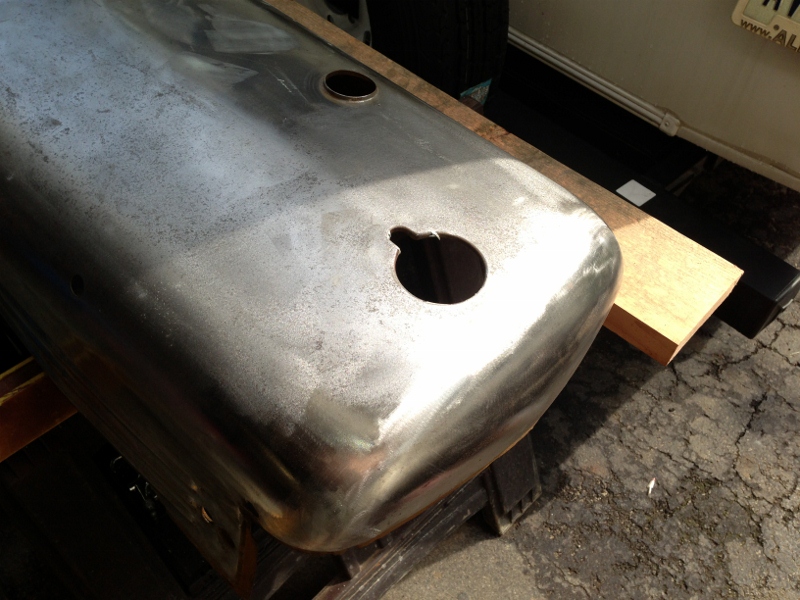
- Very Pitted Around Radiator - Now Very Smooth
- IMG_2329 - Copy (800x600).jpg (259.51 KiB) Viewed 456 times
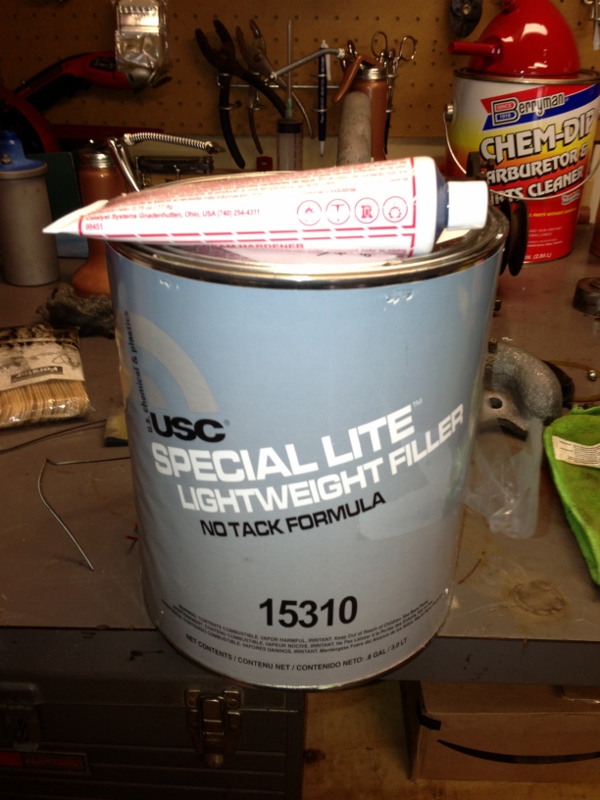
- The USC Filler I Used
- IMG_2276 (600x800).jpg (246.62 KiB) Viewed 457 times
Re: Seat and Hood Restoration
Posted: Mon Jul 08, 2013 8:53 pm
by ricky racer

You know we love pictures!!!!

Re: Seat and Hood Restoration
Posted: Mon Jul 08, 2013 8:54 pm
by Rob in NH
i use a filler that i sand in 15 minutes and doesn't load up the paper. i would look into a different filler.
Re: Seat and Hood Restoration
Posted: Mon Jul 08, 2013 9:01 pm
by Bill Hudson
Rob in NH wrote:i use a filler that i sand in 15 minutes and doesn't load up the paper. i would look into a different filler.
Rob,
And that filler would be? Sounds like something many folks could use.
Thanks.
Bill
Re: Seat and Hood Restoration
Posted: Mon Jul 08, 2013 9:30 pm
by Boss Hog
Bill Hudson wrote:Rob in NH wrote:i use a filler that i sand in 15 minutes and doesn't load up the paper. i would look into a different filler.
Rob,
And that filler would be? Sounds like something many folks could use.
Thanks.
Bill
Very EXPENSIVE
Re: Seat and Hood Restoration
Posted: Mon Jul 08, 2013 9:32 pm
by Rob in NH
its called Fusion and made by USC.