Page 1 of 3
DIY 3 Point Hitch
Posted: Tue Apr 23, 2013 4:00 pm
by squarebob
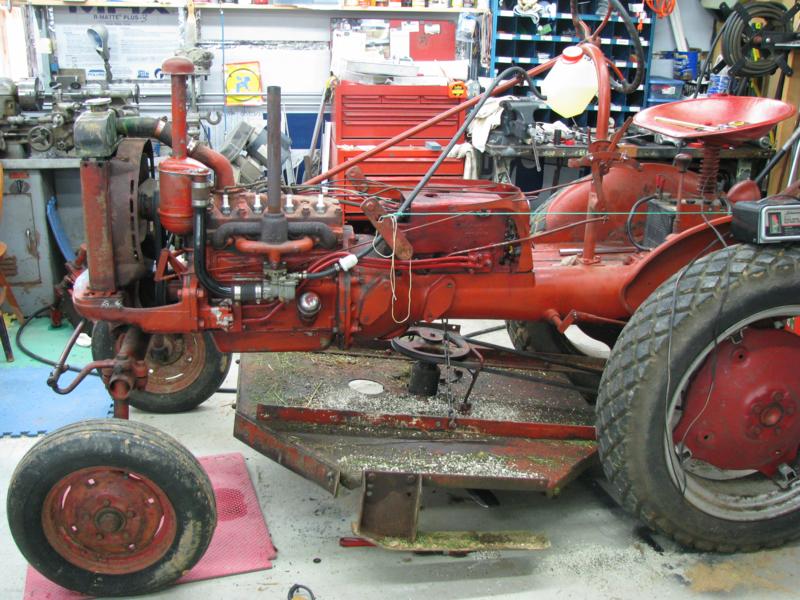
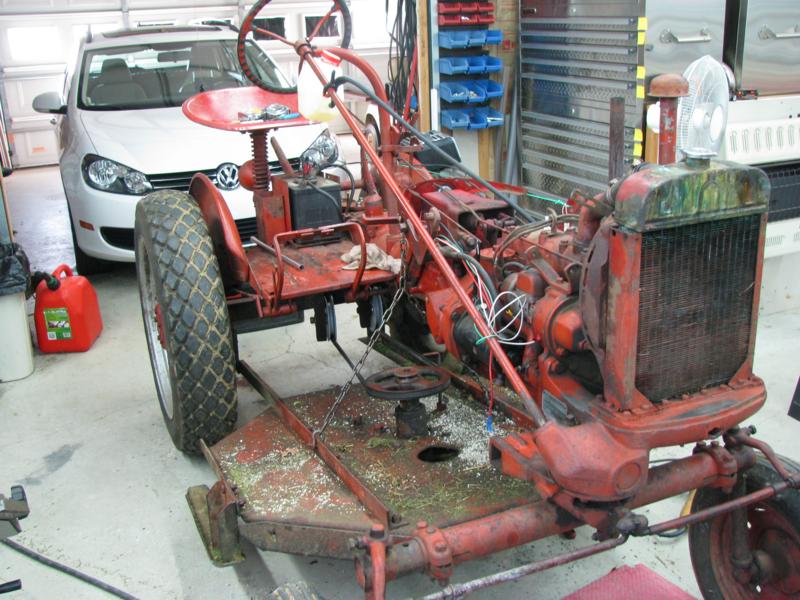
Picked up a 48 Cub a few weeks ago. I am going thru her to get everything fully functional. It has a C-2 Belly mower as the only attachment. I am in the process of making a homemade 3 point hitch and have seen quite a few good ideas here on the forum. I will document the project for those that may be interested.
- Image5.jpg (98.19 KiB) Viewed 8790 times
- Image3.jpg (90.1 KiB) Viewed 8790 times
Bob
Re: DIY 3 Point Hitch
Posted: Tue Apr 23, 2013 4:06 pm
by squarebob
Re: DIY 3 Point Hitch
Posted: Wed Apr 24, 2013 8:52 am
by squarebob
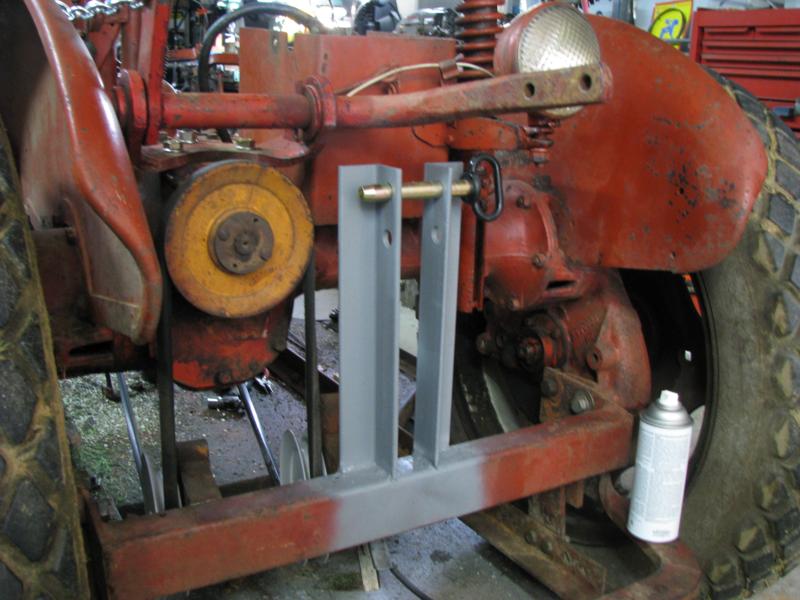
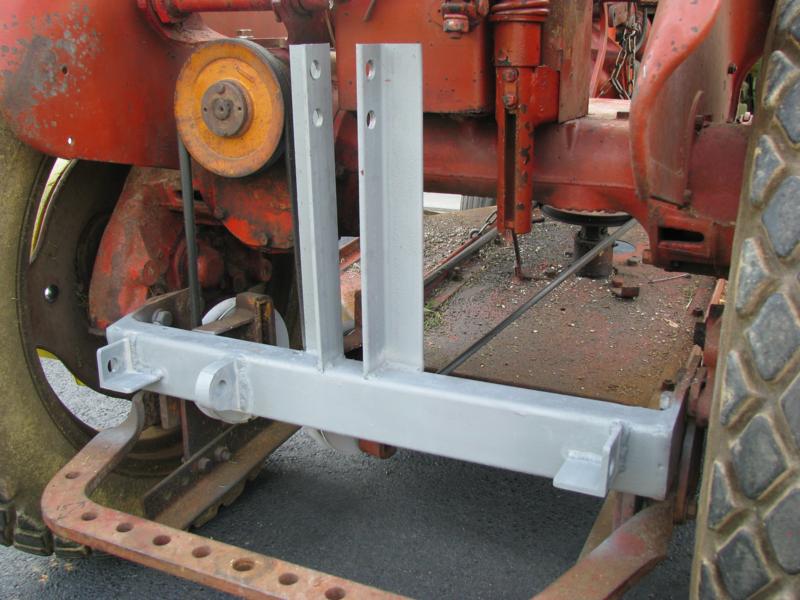
Well the specs say the top link mast height should be 18" above level lifting rods. Hard to do on a Cub. This is as high as I dare get the top link pin to avoid conflict with the rockshaft. Angle is 2x2x 1/4"
- Image1.jpg (65.81 KiB) Viewed 8685 times
Re: DIY 3 Point Hitch
Posted: Wed Apr 24, 2013 9:50 am
by Jim Becker
I believe mast height refers to the dimensions on the implement, not where the links attach to the tractor. To get the pin locations on the tractor right, you need to review Appendix A of your reference document. A lot of homemade 3-point hitches seem to "not work right" for reasons unknown to the builder. I think getting those locations wrong is the main source of the problems.
Re: DIY 3 Point Hitch
Posted: Wed Apr 24, 2013 10:01 am
by squarebob
Yup, your right. That pesky vertical convergence distance!! I have noticed that having the top link too low on a tractor will really pitch up the back of the implement in the raised position. Good in some cases, not so good in most I have seen.
Re: DIY 3 Point Hitch
Posted: Wed Apr 24, 2013 10:44 am
by Rick Prentice
I'm still trying to get the common sense factor of the forward pivot points of the lower lift arms versus the top link being different . When I made my hitches, I focused on the forward pivots being in vertical alignment so no matter what height you had the implement, It stayed at that fixed level position that you had the top length adjusted for. Having the front pivots out of align just didn't make sense to me. If you had a 3 point plow attached, and the pivots weren't in perfect vertical alignment with each other, the plow point would change at every up/down increment you made. Mine, once you adjusted the top link, the plow stayed the same however deep you wanted to plow. I don't get their reasoning.
Rick
Re: DIY 3 Point Hitch
Posted: Sat May 11, 2013 9:11 am
by squarebob
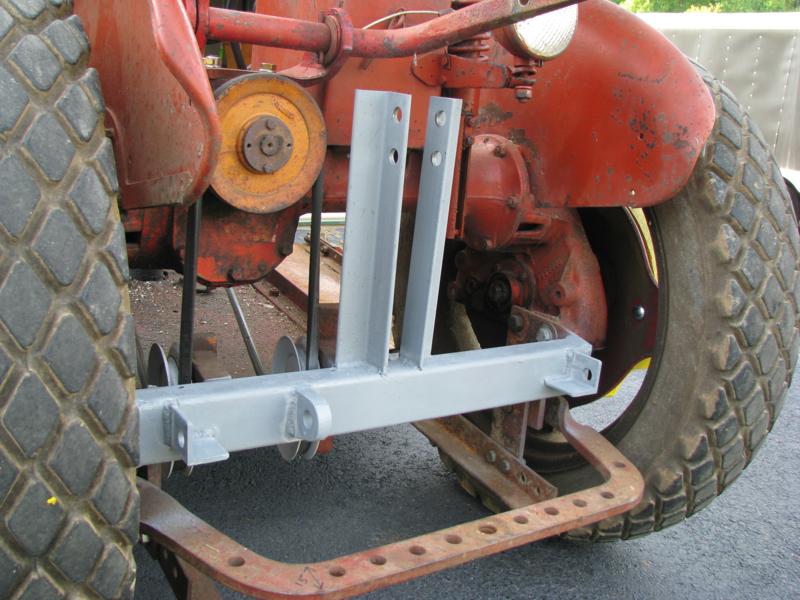
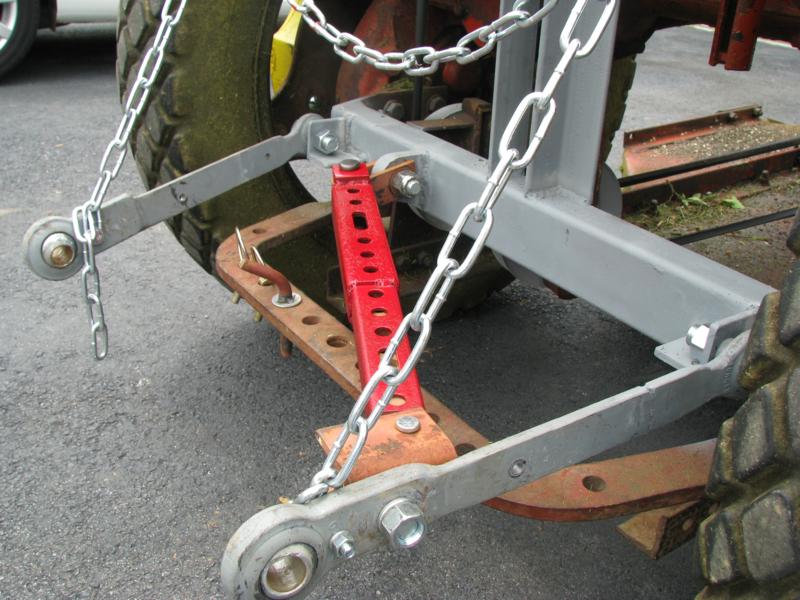
I got the other brackets for the lift arms and stablizer welded in place and primed. Progress!!
- Image3.jpg (75.84 KiB) Viewed 8504 times
- Image4.jpg (70.15 KiB) Viewed 8504 times
Re: DIY 3 Point Hitch
Posted: Sat May 11, 2013 10:09 am
by Rudi
Bob:
I certainly do not understand the intricacies of 3-point hitch design, but something we stumbled across when I was doing my splitter project is that the height from draw bar to the rear rockshaft were almost perfectly matched to the 3-point on Ray's Massey. I know I didn't explain that right ... but nevertheless it sure made it simpler to fabricate the mounting hardware for swapping between my Cub and the Massey. Have a look at my splitter project in the Projects Forum - it is back on page 1. It might be useful.
I am curious to see where you go with this. I am always interested in how folks design/fabricate and their reasoning behind it. My curiosity about why you are using the mule drive for the C-2 is piqued .. so ifn you can delineate your reasoning, it would be great.
Keep posting pics etc., as you go along with this project.
Re: DIY 3 Point Hitch
Posted: Sat May 11, 2013 12:49 pm
by squarebob
I am using the C-2 Drive as the mounting points because I am lazy!! I don't want to keep removing and replacing things if I don't have to. When I need to use the 3 point hitch, I just chain the C-2 in the up position and then have the rear rock shaft to use with the 3 point without the mower going up and down with the rear implements. I also set the lift bar link brackets outboard a little further than spec so I can keep the stock drawbar in place and not have interference when the 3 point is in a low position. I plan to use a box blade and dirt scoop as the primary 3 point implements. Of course one can't have too many tools!
Re: DIY 3 Point Hitch
Posted: Sat May 11, 2013 2:30 pm
by squarebob
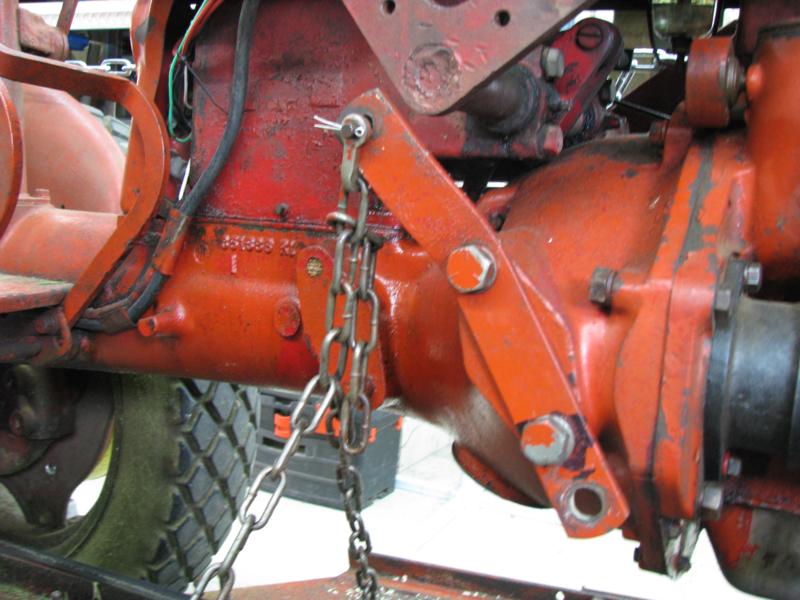
I drilled another hole in the C-2 lift bracket so I could mount it to the bellhousing to keep the mower up and out of the way when using the 3 point hitch.
- Image20.jpg (67.1 KiB) Viewed 8448 times
Re: DIY 3 Point Hitch
Posted: Sat May 11, 2013 4:01 pm
by squarebob
I made the lift arms from ends I got at Tractor Supply. 7/8" at the implement end and 3/4" at the tractor end. I got the sway brace from a neighbor.
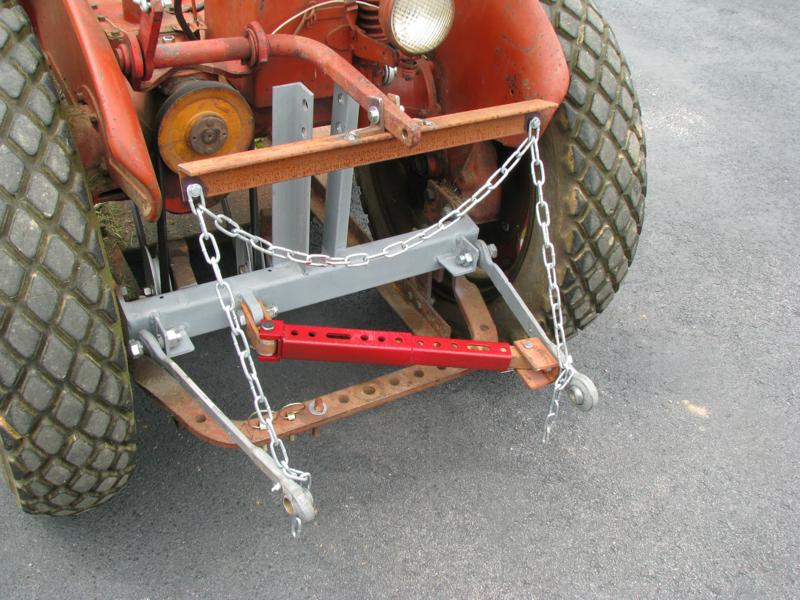
- Image10.jpg (88.75 KiB) Viewed 8426 times
- Image12.jpg (81.11 KiB) Viewed 8426 times
Re: DIY 3 Point Hitch
Posted: Sat May 11, 2013 9:27 pm
by Rudi
Bob:
This is really interesting. Really interesting. I kinda like how this turned out. Looking forward to seeing one of your 3 point implements hooked up. This looks like exactly what you wanted to accomplish.

Re: DIY 3 Point Hitch
Posted: Sun May 12, 2013 8:05 am
by PVF1799
That is a fine piece of work....Might have to try that myself someday, after all the restoration work is done.
Re: DIY 3 Point Hitch
Posted: Sun May 12, 2013 8:14 am
by olebluegrassboy
I like it a lot! That sway bar is a lot stronger than the old flat stabilizer arm, maybe even too strong, still very nice!
Re: DIY 3 Point Hitch
Posted: Sun May 12, 2013 9:19 am
by squarebob