This site uses cookies to maintain login information on FarmallCub.Com. Click the X in the banner upper right corner to close this notice. For more information on our privacy policy, visit this link: Privacy Policy
NEW REGISTERED MEMBERS: Be sure to check your SPAM/JUNK folders for the activation email.
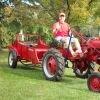
New to Me Farmall AV
Forum rules
Notice: For sale and wanted posts are not allowed in this forum. Please use our free classifieds or one of our site sponsors for your tractor and parts needs.
Notice: For sale and wanted posts are not allowed in this forum. Please use our free classifieds or one of our site sponsors for your tractor and parts needs.
-
Slim140

- 5+ Years

- Posts: 4908
- Joined: Wed Nov 22, 2017 6:24 am
- Zip Code: 00000
- Tractors Owned: .
1970 International 140
1972 International 140
1949 John Deere A
1993 Ford 4630 W/Loader
1965 John Deere 110
1961 Cub Cadet Original - Circle of Safety: Y
Re: New to Me Farmall AV
Looks good Stanton, I may try this on our 140 this winter.
Every home is a school, what are you teaching?

-
Stanton
- Cub Pro

- Posts: 7760
- Joined: Mon Jun 22, 2009 6:56 am
- Zip Code: 64070
- Tractors Owned: 1942 Farmall AV, serial #87025
1947 Farmall Circle Cub, serial #2116
1948 Farmall Cub, serial #46066 - Circle of Safety: Y
- Location: Lone Jack, MO
Re: New to Me Farmall AV
Shane Nelson wrote:Looks good Stanton, I may try this on our 140 this winter.
I suppose, if you had access to a metal-cutting bandsaw, you could cut the teeth in the sheet metal before cutting it out and bending/welding it into place. As a flat piece of sheet metal, you'd have more control cutting the teeth on the bandsaw and, hopefully, get more uniform cuts/teeth. I used a 4-1/2" disc cutoff wheel on my angle grinder, cutting them freehand. The thickness of the disc made it hard to get uniform results.
Thanks anyway, though.
Stanton

-
AL Farmall Boy

- 10+ Years

- Posts: 2555
- Joined: Tue Aug 10, 2010 6:38 pm
- Zip Code: 35630
- Circle of Safety: Y
Re: New to Me Farmall AV
Stanton wrote:Shane Nelson wrote:Looks good Stanton, I may try this on our 140 this winter.
I suppose, if you had access to a metal-cutting bandsaw, you could cut the teeth in the sheet metal before cutting it out and bending/welding it into place. As a flat piece of sheet metal, you'd have more control cutting the teeth on the bandsaw and, hopefully, get more uniform cuts/teeth. I used a 4-1/2" disc cutoff wheel on my angle grinder, cutting them freehand. The thickness of the disc made it hard to get uniform results.
A dremel secured into a stand might work well too.
Regards,
Chase
205-368-5339
ihfarmallrtr@gmail.com
 Follow my page "Alabama Tractor Pickers" on YouTube & Facebook!
Chase
205-368-5339
ihfarmallrtr@gmail.com
Follow my page "Alabama Tractor Pickers" on YouTube & Facebook! -
Stanton
- Cub Pro
- Posts: 7760
- Joined: Mon Jun 22, 2009 6:56 am
- Zip Code: 64070
- Tractors Owned: 1942 Farmall AV, serial #87025
1947 Farmall Circle Cub, serial #2116
1948 Farmall Cub, serial #46066 - Circle of Safety: Y
- Location: Lone Jack, MO
Re: New to Me Farmall AV
The footrest on my AV was deteriorated and worn. Thought I would try and make a new one. Bought a 1/2"dia. x 36" long (1/16" thick sidewall) stick of pipe at Home Depot or some such place and laid out everything I needed:
First, use the duct tape to seal off one end. Then use the funnel to add the sand into the pipe. Tamp it down good and fill it all the way to the top. Seal the other end with duct tape.
Looking around the shop, I spied a heavy gauge piece of 2" pipe. It fit the radius of the old footrest, so placed it in my heavy-duty vise and using a few thick washers, was able to wedge the pipe in between the back of the vise/washers and the pipe.
Bent the 1/2" pipe without any problem or kinks. Made a nice 90 degree bend, leaving plenty extra on the end. Marked my new pipe with the old footrest and made the second bend.
Leaving a generous portion of the pipe, I trimmed off about a 3" piece. Wondering how this pipe would react to my 12 ton press, I flattened out the waste piece as a test. The pressing of pipe automatically set the appropriate angle. I always like it when things fall into place.
The rest was trimming, grinding and drilling.
Was pretty pleased with the finished product. I'll throw it on the pile and it'll get primer and paint sometime down the road.
- duct tape
- funnel
- sand
- 1/2" pipe
First, use the duct tape to seal off one end. Then use the funnel to add the sand into the pipe. Tamp it down good and fill it all the way to the top. Seal the other end with duct tape.
Looking around the shop, I spied a heavy gauge piece of 2" pipe. It fit the radius of the old footrest, so placed it in my heavy-duty vise and using a few thick washers, was able to wedge the pipe in between the back of the vise/washers and the pipe.
Bent the 1/2" pipe without any problem or kinks. Made a nice 90 degree bend, leaving plenty extra on the end. Marked my new pipe with the old footrest and made the second bend.
Leaving a generous portion of the pipe, I trimmed off about a 3" piece. Wondering how this pipe would react to my 12 ton press, I flattened out the waste piece as a test. The pressing of pipe automatically set the appropriate angle. I always like it when things fall into place.
The rest was trimming, grinding and drilling.
Was pretty pleased with the finished product. I'll throw it on the pile and it'll get primer and paint sometime down the road.
Stanton
-
Slim140
- 5+ Years
- Posts: 4908
- Joined: Wed Nov 22, 2017 6:24 am
- Zip Code: 00000
- Tractors Owned: .
1970 International 140
1972 International 140
1949 John Deere A
1993 Ford 4630 W/Loader
1965 John Deere 110
1961 Cub Cadet Original - Circle of Safety: Y
Re: New to Me Farmall AV
Looks great Stanton, I love it when government projects turn out good without the "proper" tools 
Every home is a school, what are you teaching?
-
outdoors4evr
- 10+ Years
- Posts: 2791
- Joined: Tue Jul 22, 2008 12:44 pm
- Zip Code: 48370
- Tractors Owned: 184
- Location: Oxford, MI
Re: New to Me Farmall AV
Stanton, I love your attention to detail and the creative - possibly old school - ways of recreating components. I had never heard of using sand to keep a pipe from collapsing while bending. Today I learned a "new, old trick".
Thank you for posting. We all learn a great deal from your posts.
Thank you for posting. We all learn a great deal from your posts.
184 w/ Creeper & 3-Point
IH 3160a Mower
IH Model 15 Tiller
IH-54 Blade
IH 3160a Mower
IH Model 15 Tiller
IH-54 Blade
-
Stanton
- Cub Pro
- Posts: 7760
- Joined: Mon Jun 22, 2009 6:56 am
- Zip Code: 64070
- Tractors Owned: 1942 Farmall AV, serial #87025
1947 Farmall Circle Cub, serial #2116
1948 Farmall Cub, serial #46066 - Circle of Safety: Y
- Location: Lone Jack, MO
Re: New to Me Farmall AV
Having a devil of a time getting the left brake off the rod (the 2 arrows in the attached pic). I don't have an oxy/acetylene torch. Used a grinder to grind down the end of rod flush with brake pedal, in case there was any mushrooming of the rod. Have used lots of 50/50 transmission fluid/acetone. Have also heated it up with a propane torch. Used a 2-jaw and 3-jaw puller; no movement.
Any advice on how to tackle this?
I'm about to cut the other end off, pull the rod/brake out, get them separated (away from the tractor), then reweld the little dogleg back on.
Thoughts?
Any advice on how to tackle this?
I'm about to cut the other end off, pull the rod/brake out, get them separated (away from the tractor), then reweld the little dogleg back on.
Thoughts?
Stanton
-
Slim140
- 5+ Years
- Posts: 4908
- Joined: Wed Nov 22, 2017 6:24 am
- Zip Code: 00000
- Tractors Owned: .
1970 International 140
1972 International 140
1949 John Deere A
1993 Ford 4630 W/Loader
1965 John Deere 110
1961 Cub Cadet Original - Circle of Safety: Y
Re: New to Me Farmall AV
Have any friends with an oxy/acetylene torch? There is a huge difference in the amount of heat put out between them and a propane torch.
Every home is a school, what are you teaching?
-
Stanton
- Cub Pro
- Posts: 7760
- Joined: Mon Jun 22, 2009 6:56 am
- Zip Code: 64070
- Tractors Owned: 1942 Farmall AV, serial #87025
1947 Farmall Circle Cub, serial #2116
1948 Farmall Cub, serial #46066 - Circle of Safety: Y
- Location: Lone Jack, MO
Re: New to Me Farmall AV
Shane Nelson wrote:Have any friends with an oxy/acetylene torch? There is a huge difference in the amount of heat put out between them and a propane torch.
I know there is a big difference. I'll ask around. Have been looking for an excuse to buy a set...
Stanton
-
Rick Spivey

- Cub Pro
- Posts: 2778
- Joined: Sun Jul 01, 2007 10:07 pm
- Zip Code: 29518
- Circle of Safety: Y
- Location: SC, Cades 29518
Re: New to Me Farmall AV
Cheaper, and may work, is to buy a MAPP gas refill for your propane torch head. Same canister, just yellow, and a bit hotter. Probably less than $10 if it works....if not, the MAPP is more useful to have around anyway.
Rick Spivey
'52 Cub ("Great Personality") 148xxx
'48 Cub with FH ("Gunny Cub") 38xxx
'57 Lambretta (a slow work in progress)
'74 Triumph TR6 (Mama's toy)
'52 Cub ("Great Personality") 148xxx
'48 Cub with FH ("Gunny Cub") 38xxx
'57 Lambretta (a slow work in progress)
'74 Triumph TR6 (Mama's toy)
-
Don McCombs

- Team Cub Mentor

- Posts: 17477
- Joined: Mon Feb 03, 2003 6:45 am
- Zip Code: 21550
- Tractors Owned: "1950 Something" Farmall Cub
1957 Farmall Cub w/FH
1977 International Cub w/FH
1978 International Cub
1948 Farmall Super A - Circle of Safety: Y
- Location: MD, Deep Creek Lake
Re: New to Me Farmall AV
I don't believe that you can use "MAPP" with a propane head. I think you can do the reverse, however.
https://www.hunker.com/13415241/mapp-gas-vs-propane-gas
https://www.hunker.com/13415241/mapp-gas-vs-propane-gas
Don McCombs
MD, Deep Creek Lake
Proud Member of Maryland Chapter 39
The best teachers are those who show you where to look, but don't tell you what to see.
A. K. Trenfor
MD, Deep Creek Lake
Proud Member of Maryland Chapter 39
The best teachers are those who show you where to look, but don't tell you what to see.
A. K. Trenfor
-
randallc

- Cub Pro
- Posts: 1906
- Joined: Tue Jan 18, 2011 9:16 am
- Zip Code: 72940
- Tractors Owned: 1951 Farmall Cub, 152 disk plow, 2 gang disk, belly mower, sickle mower
1949 Farmall Cub, cultivator, moldboard plow, disk,front blade. Cub Cadet, LTX1045 Mower. Cub Cadet's 109, 125, 1000, and 1250
1961 cub c2 belly mower and full blade. 48 cub manual lift with cultivators.
1947 Cub - Circle of Safety: Y
- Location: Huntington, AR
Re: New to Me Farmall AV
Your shop needs a good acetylene set. You'll find many uses for it.
Guinea, 1951 Farmall Cub; Jumping Willy, 1949 Farmall Cub, 61 Cub, Scrapy, and 48 Cub Al, 48 cub, Billy D.
-
Stanton
- Cub Pro
- Posts: 7760
- Joined: Mon Jun 22, 2009 6:56 am
- Zip Code: 64070
- Tractors Owned: 1942 Farmall AV, serial #87025
1947 Farmall Circle Cub, serial #2116
1948 Farmall Cub, serial #46066 - Circle of Safety: Y
- Location: Lone Jack, MO
Re: New to Me Farmall AV
Thanks for the suggestions.
On another front, a governor rebuild question: is the governor thrust bushing supposed to fit tightly or slide freely on the shaft?
On another front, a governor rebuild question: is the governor thrust bushing supposed to fit tightly or slide freely on the shaft?
Stanton
-
Stanton
- Cub Pro
- Posts: 7760
- Joined: Mon Jun 22, 2009 6:56 am
- Zip Code: 64070
- Tractors Owned: 1942 Farmall AV, serial #87025
1947 Farmall Circle Cub, serial #2116
1948 Farmall Cub, serial #46066 - Circle of Safety: Y
- Location: Lone Jack, MO
Re: New to Me Farmall AV
Stanton wrote:Thanks for the suggestions.
On another front, a governor rebuild question: is the governor thrust bushing supposed to fit tightly or slide freely on the shaft?
I'll answer that: It's supposed to slide loosely along the shaft of the pinion as the weights open and close.
Finished the governor rebuild over the weekend. Here's a few pics, beginning with my evaluation of what needed to be replaced:
Parts I ordered:
Grainger
- Needle Bearing, item # 35TX17, Mfr. Model # BH68 OH
- Spring, item # 54KX48, Mfr. Model # C02400421380M
- Seal/Retainer for the Speed Shaft, item # 5154T11
- Thrust Bearing, item # 6655K17
- Governor Spring
Download and use the Service Manual for the Farmall A and B, and the Parts Manual. Both were most helpful. Work in a clean area, trying to keep all parts as clean as possible. Use same motor oil as you use for your tractor as lubricant.
First, disassemble the governor. Most everything comes out in a fairly straightforward way. I used the Governor Rockshaft to help push out the internal needle bearing.
Lay everything out on a clean paper towel and inspect. You can see from the pic that the thrust bearing disintegrated; from what, I don't know, but it must have produced some heat to melt a portion of the thrust sleeve.
Clean all the pieces to be re-used and the castings. Use a little motor oil and install the new needle bearings. First one goes on the inside of the casting. I was able to get a socket extension through the outer bearing opening, put the socket on and tap/drive/push the needle bearing into place.
This was followed up by the installing the outer bearing.
After that, install the seal/retainer for the Speed Change Lever and the retainer/leather seal for the Rockshaft. I had some leather that I used to cut a new seal; re-used the original retainer.
With the seals/retainers in place, next pre-assemble the Governor Rockshaft Lever casting (internal) to the Speed Change Lever. Insert the Rockshaft rod through the internal Rockshaft casting with the Governor Spring and Governor Spring Lever attached, line up the holes in the casting and rod to insert the spirol pin. Then, finish installing the hardware for the Speed Change Lever. I found it easier to get the Governor Spring hooked in both places BEFORE putting this all back together; you may differ. When installing the Governor Spring, be sure to have the open portion of the top hook facing the left, toward the housing (per the Service Manual). The next picture shows it in the wrong direction. The top hook needs to be facing the other way. The second picture shows it correctly. The Rockshaft should rotate freely with no drag whatsoever.
Next, re-install the weights, lining the pin hole up with the weight hole for the cotter pin. Install the Thrust Sleeve and Thrust Bearing. I re-used the nylon thrust sleeve by filing out the burrs inside until it slid smoothly along the shaft.
Lastly, install the spring and pin. Use the old springs for estimated length. The spring that goes inside the Governor Pinion shaft (concealed) was the correct length out of the package. The Governor Bumper Spring had to be trimmed down.
I cut a new gasket, installed the welsh plug and bagged it away for installation later.
I will be anxious to get this installed and see how she works.
Stanton
-
Stanton
- Cub Pro
- Posts: 7760
- Joined: Mon Jun 22, 2009 6:56 am
- Zip Code: 64070
- Tractors Owned: 1942 Farmall AV, serial #87025
1947 Farmall Circle Cub, serial #2116
1948 Farmall Cub, serial #46066 - Circle of Safety: Y
- Location: Lone Jack, MO
Re: New to Me Farmall AV
Was able to get the left brake off the rod without using an oxy/acet torch. Once I realized the rod had been mushroomed slightly, there was no way it was coming off. I tapped the left brake casting back up the rod, out of the way, then filed and ground down the mushroomed end until it slipped off. 
Turning my attention to the seat. The remnants of the old padded seat were still in the lip, so it needed to be pried up and cleaned out.
It had a piece cut out of it that needed repair.
Hole squared up with a grinder/cutting disc and a piece of same gauge sheetmetal bent and formed to match the 1/4" inside diameter of the rolled lip.
Welded and ground down. Ready for seat fabric.
If the right seat support could talk, bet it could tell some stories. Somebody did a number on it.
Had a scrap of 1/8" sheet metal in the pile. Cleaned and squared up the ragged edge of the cut and used the left seat support as a guide.
Welded in place and ground down.
Am still working on those extra, raggedy holes. Will get them plugged and welded.
By the way, took my engine to an overhaul guy about 4 miles from me about a week ago. Will let you know more about it once complete.
Turning my attention to the seat. The remnants of the old padded seat were still in the lip, so it needed to be pried up and cleaned out.
- An old chisel from an auction purchase.
- A 3-in-1 tool from an auction purchase.
- The woven cord used to install the fabric seating material.
It had a piece cut out of it that needed repair.
- A piece had been ground away, exposing the lip.
Hole squared up with a grinder/cutting disc and a piece of same gauge sheetmetal bent and formed to match the 1/4" inside diameter of the rolled lip.
- Formed with a 1/4" diameter screwdriver inside.
- Basic shape. Now to cut to length.
- Dry fit; ready for welding.
Welded and ground down. Ready for seat fabric.
- Topside.
- Bottom.
If the right seat support could talk, bet it could tell some stories. Somebody did a number on it.
- Extra holes, rusting away and part of the front edge cut away.
Had a scrap of 1/8" sheet metal in the pile. Cleaned and squared up the ragged edge of the cut and used the left seat support as a guide.
Welded in place and ground down.
Am still working on those extra, raggedy holes. Will get them plugged and welded.
By the way, took my engine to an overhaul guy about 4 miles from me about a week ago. Will let you know more about it once complete.
Stanton
Return to “Farmall A, Super A, AV, 100, 130 & 140”
Who is online
Users browsing this forum: No registered users and 12 guests


