Page 1 of 3
Cub Cadet 145??? Well, you'll see.
Posted: Tue Dec 31, 2013 1:40 pm
by gitractorman
I just picked up a pretty cool little project, but am looking for your opinions on how to go forward with it. The tractor is a Cub Cadet 105, that someone dropped a brand new Kohler 14-hp engine in. The tractor runs, operates perfect, but is in need of cosmetic restoration, so I'm planning to do it with my boys over this winter.
Here's my delimma. While installing the 14-hp engine, they attempted to notch the frame (as was done on the 147 to install the 14-hp engine with the larger flywheel) but they just didn't do a great job. It works, and is functional, just messy looking, and they welded on some extra angle iron, as some structural support I guess.
As it turns out, I have a spare frame from a 125 sitting out behind the barn. I'm thinking of taking that frame, doing the correct modification/notch for the 14hp engine, then doing a part-by-part rebuild of the tractor. I think I could set the two next to each other, take off a part, clean/paint, then re-install on the new frame. The end result would be a Cub Cadet 145 (which I know never existed, but is interesting...).
I've been doing some research and finding photos of real 147 tractors, so I could mimic the factory notch. It looks like they took the standard frame, cut then bent the ears out for welding tabs. Then welded on a pre-fabricated U that extended the frame outwards.
Also, I'm even thinking about having 145 decals made up for it. I figure a printer could take the 4 from the 124 decal, and place it where the 2 is in the 125 decal, with little effort. Let me know your thoughts. I'll grab some pictures once I get it all in the garage and can get started on it. Just doing some research for now.
Thanks,
Bill
Re: Cub Cadet 145??? Well, you'll see.
Posted: Tue Dec 31, 2013 10:13 pm
by dgrapes59
Go for it Bill! It sounds like a good father / son project and I am sure it will end up first class!
Keep us posted,
Re: Cub Cadet 145??? Well, you'll see.
Posted: Thu Jan 02, 2014 8:38 am
by outdoors4evr
A great sounding winter project with the boys??? I don't see the downside. (Especially if you have a frame to play with)
Re: Cub Cadet 145??? Well, you'll see.
Posted: Tue Jan 21, 2014 10:28 pm
by 56cub
Another route you could go to avoid notching the frame is to swap the 14hp engines shroud, flywheel and bearing plate for one from a 12hp Kohler.
Re: Cub Cadet 145??? Well, you'll see.
Posted: Sat Feb 01, 2014 4:45 pm
by BigBill
They offer 148 decals already for the 14hp engine swap in the 108cc in the wide frame. I have a 1200 I upgraded from a 1000cc
and I'd like to stick a 14hp in it next. The 12hp just bullies it's way through grass with no hesitation. The 14hp & 16hp engines
have to be animals.
For snitching the frame for the flywheel clearance I would built a u shaped square open on one side. Make it vertical for strength. Or would a vertical U shape work that goes under this area work. The flywheel can sit in the open air with the vertical u shape frame support going under it?
Re: Cub Cadet 145??? Well, you'll see.
Posted: Sat Mar 08, 2014 4:21 pm
by gitractorman
Well I finally broke into the new build. Today, took a spare 125 frame that I had laying around, made some careful measurements and started cutting on it. I think this turned out pretty good. I'm loving my mig welder today!. I started out with flux core wire just because I had a spool in the welder already and knew it was near the end. About 1/2 way through my welding I ran out of wire, so switched over to L-56 mig wire and gas. WOW, I forgot how nice it is to weld with gas. So much cleaner!!!

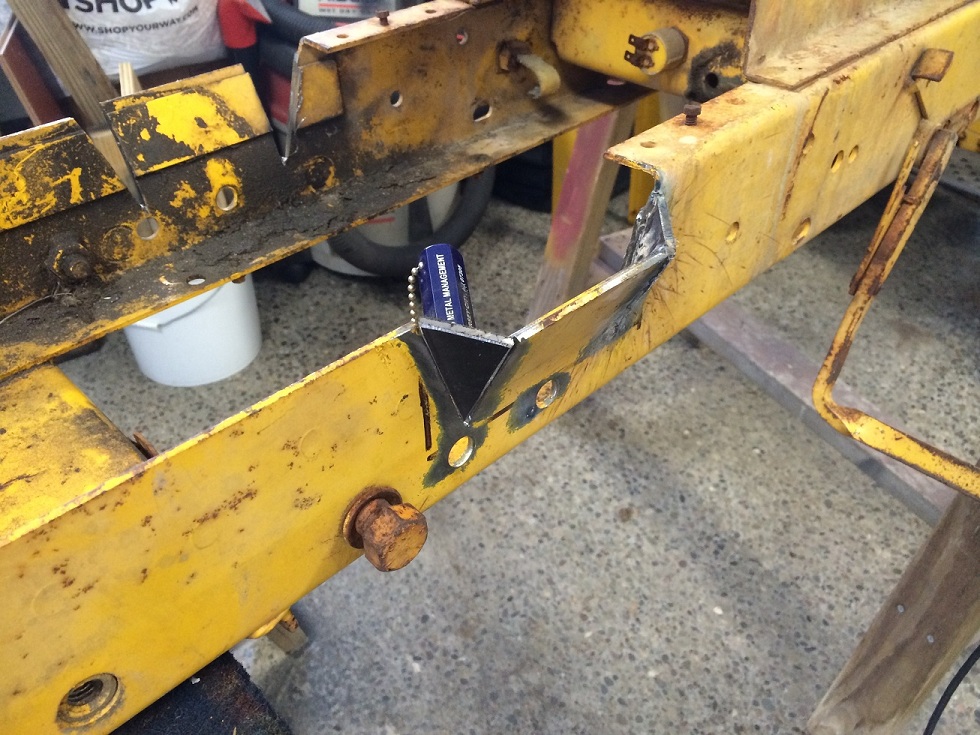
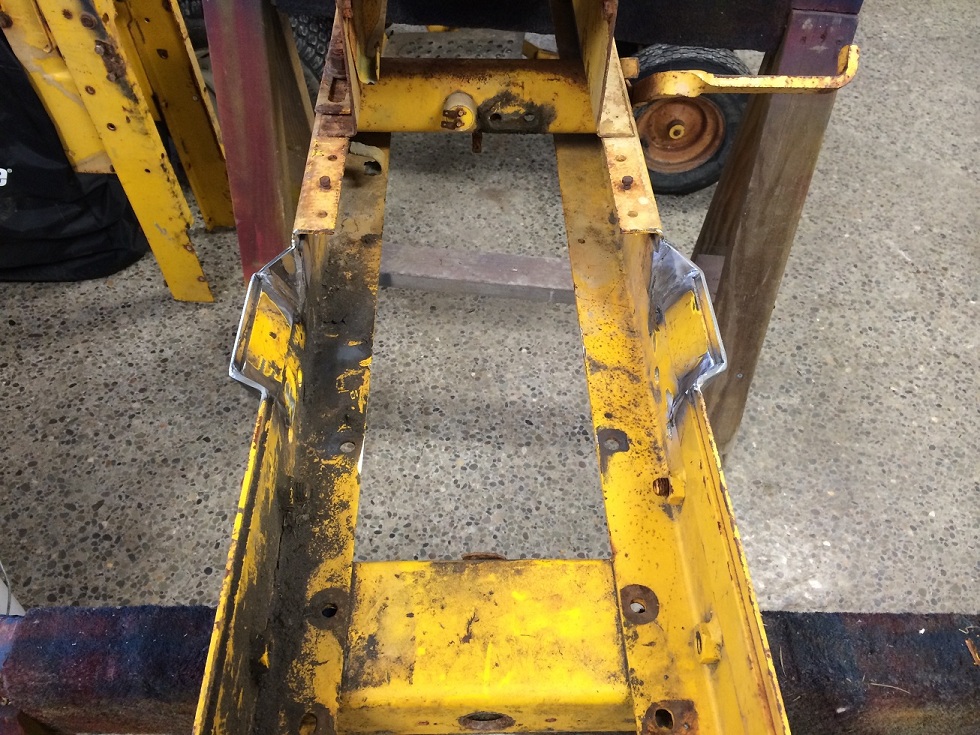
I've got a few other things to clean up on this frame, then I'm going to start to swap out parts. I think I'm going to get the front axle assembled, and the tower for the dash mounted on here, then take the whole thing over to my friend's place to sand blast it. The rest of the parts should be pretty easy to sand and paint, but this frame was a little rougher than I would like to mess with.
Thanks,
Bill
Re: Cub Cadet 145??? Well, you'll see.
Posted: Mon Mar 10, 2014 5:57 am
by Stanton
Looks like a quality job! Take some more pics after the sand blasting. We'll be interested in seeing this project along.

Re: Cub Cadet 145??? Well, you'll see.
Posted: Sun Mar 23, 2014 6:38 pm
by gitractorman
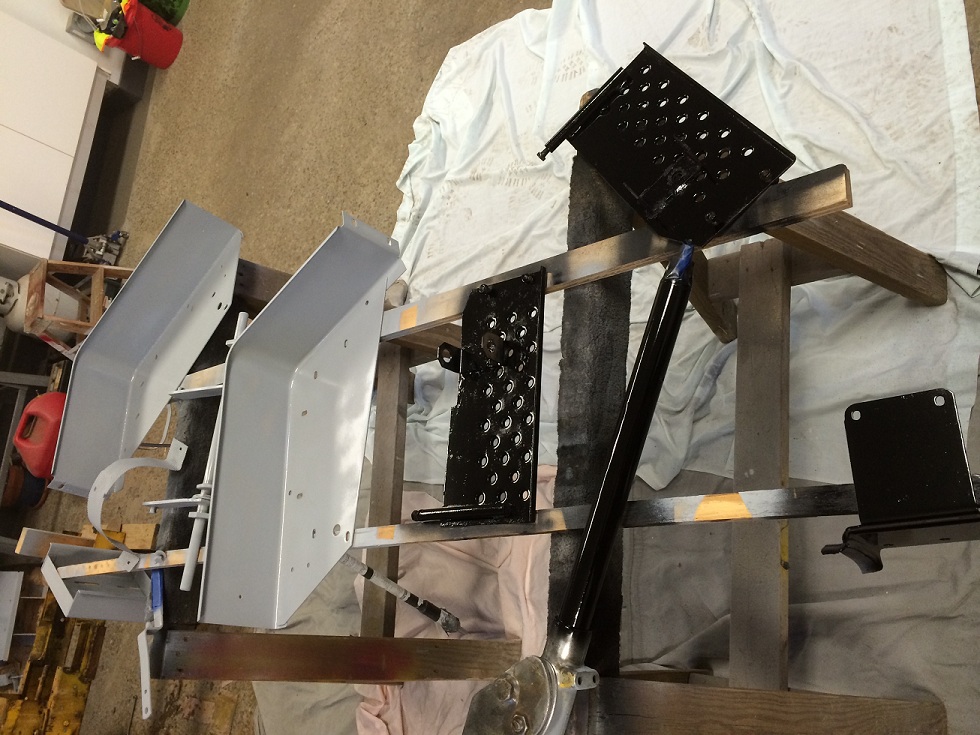
Well, it's been two weeks and I've been busy disassembling, cleaning, fixing, and finally today priming some of the parts. I'm glad I had some old spare parts from previous restorations of 124 and 125 tractors, as I've been much more "relaxed" in getting things apart when I knew I already had a replacement sitting there. It's amazing how corroded and rust siezed these things can get after 45 years. All in all things are moving along nicely though, and I've got relatively few parts that I will need to purchase. Here are some pictures of the current state of things. I ended up not getting the frame sandblasted, and instead just wire wheeled and sanded everything by hand. Also included is a picture of the remnants of the old tractor that I'm disassembling. I've decided that I'm going to shoot everything yellow that needs it, then assemble, then touch up things if needed. I think that will be easier than trying to assemble then mask off things later.
This week I'm out of town a lot, so I'm hoping all the primer cures well by next weekend. Maybe I'll get some warm weather and some yellow stuff painted!
Later,
Bill


Re: Cub Cadet 145??? Well, you'll see.
Posted: Sun Mar 23, 2014 7:03 pm
by twotone
outstanding job on that frame if that is not sandblasted. Everything sure looks good.
Re: Cub Cadet 145??? Well, you'll see.
Posted: Thu Apr 03, 2014 7:12 pm
by gitractorman
Well, my project passed a major milestone tonight. Removed the transmission and the old frame is now gone. If you ever wondered what a complete Cub Cadet looks like in parts, here you go:
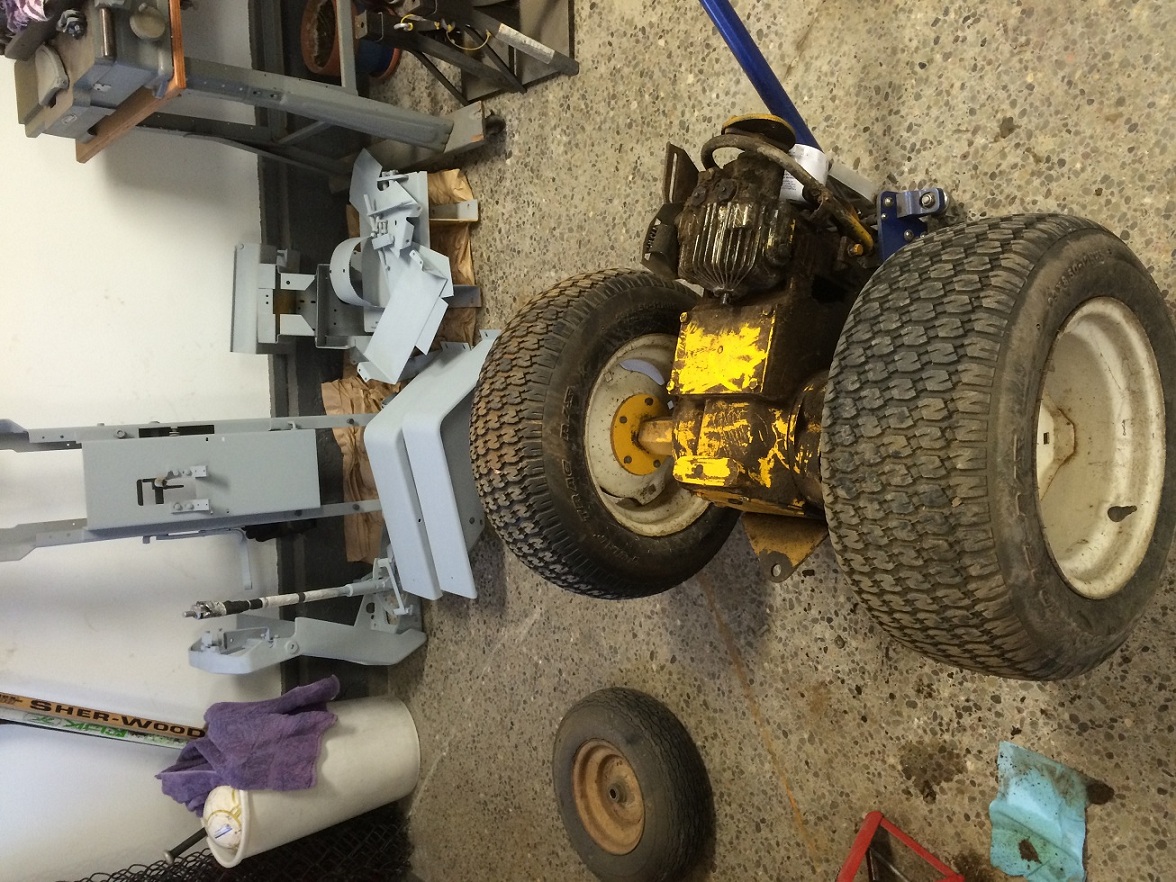
And here are the hood and now spare frames.

As you can see in the photos, I've got nearly all of the frame parts primed, and rolled the transmission out tonight for a nice soak with Simple Green and a good pressure wash. She cleaned up pretty good! It certainly looks better without 45-years of oil and dirt on it.
Next week I pick up the finish paint and will start painting parts yellow. Then we'll see if I can remember how to put everything back together

Later,
Bill
Re: Cub Cadet 145??? Well, you'll see.
Posted: Thu Apr 03, 2014 8:13 pm
by dgrapes59
Looking good!
Thanks for the update,
Re: Cub Cadet 145??? Well, you'll see.
Posted: Tue Apr 08, 2014 8:55 pm
by voltage regulator
Nice work, and geometry on the frame improvement!
Re: Cub Cadet 145??? Well, you'll see.
Posted: Thu Apr 24, 2014 8:43 pm
by gitractorman
Progress is being made, slowly, but it's getting there. Made a big step last weekend, and took advantage of the beautiful 72 degree weather to get some stuff PAINTED!!!! Here are a few pics of the yellow parts. I also got the white parts done, but didn't get a pic as it started to rain.
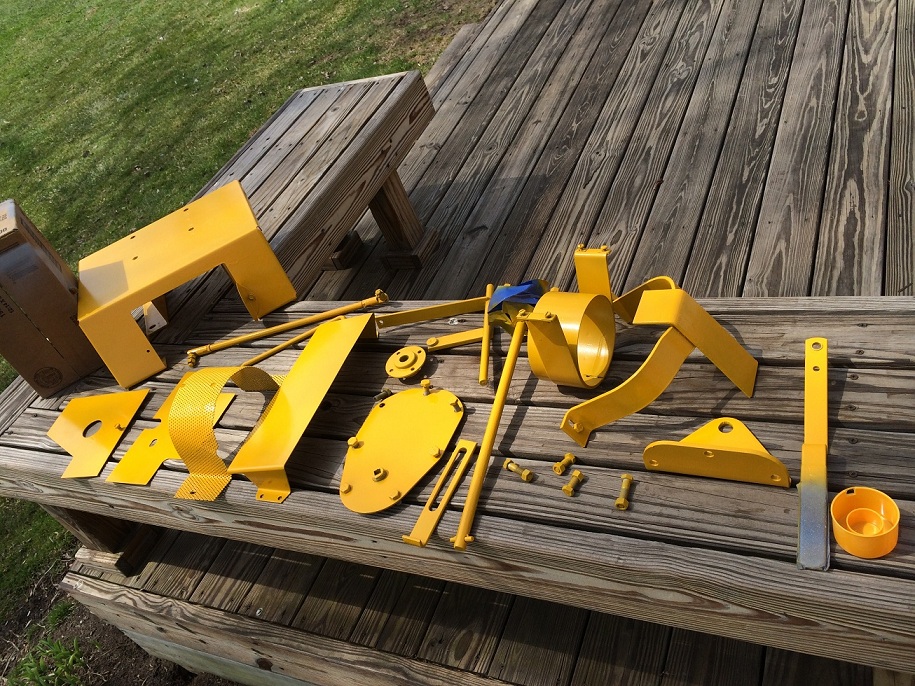
Tonight I actually started putting a few things back together, but I realized that I forgot to paint a few nuts/bolts, so I had to stop and clean/paint them. I think I've decided to get most of the pieces bolted back together and tight, then shoot a coat of paint on everything yellow, just to clean up all the wrench marks. Yea, I'm being way too picky with this one.
Later,
Bill
Re: Cub Cadet 145??? Well, you'll see.
Posted: Sun Apr 27, 2014 6:11 am
by XFARMA
Looking really good, nothing wrong with being with be picky, you'll be happier with the end result. Chuck
Re: Cub Cadet 145??? Well, you'll see.
Posted: Sun Apr 27, 2014 9:01 pm
by gitractorman
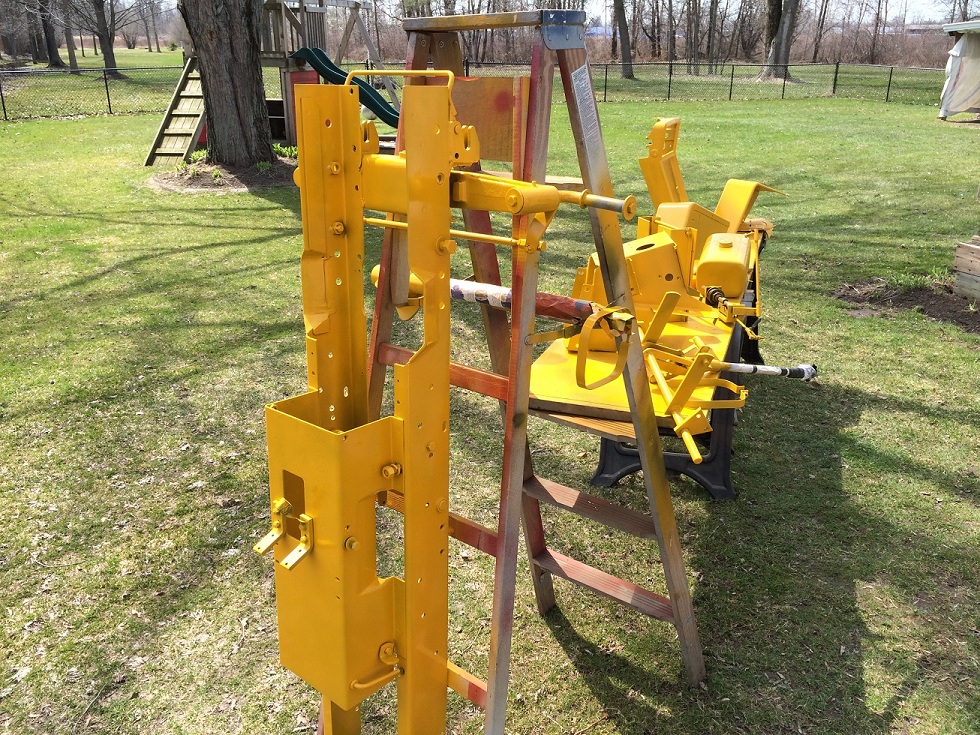
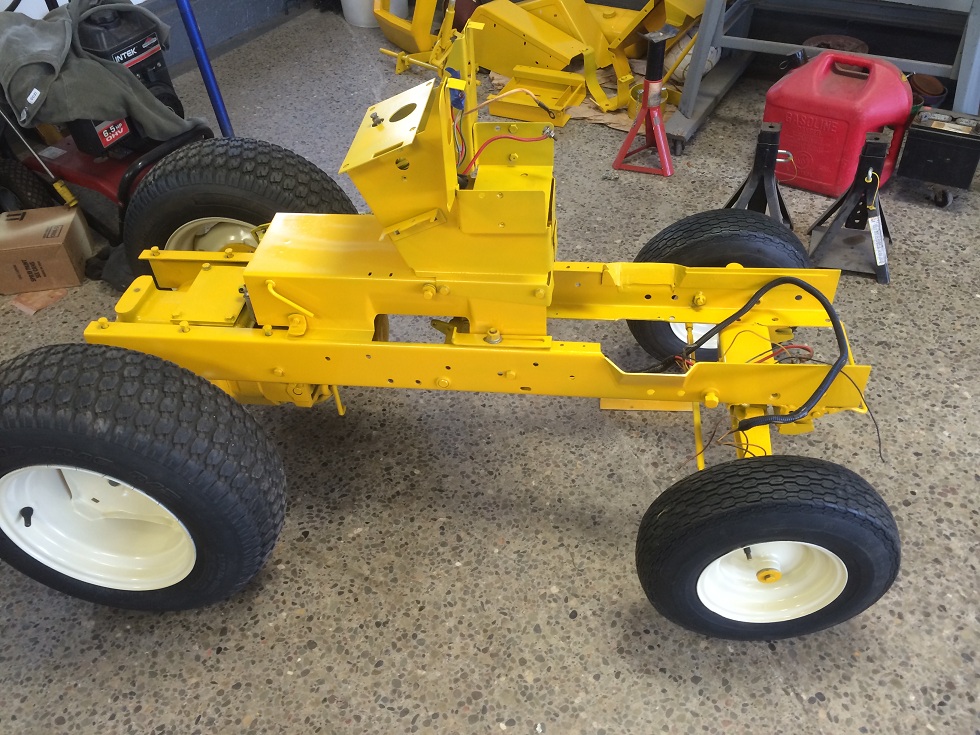
Now I'm making some PROGRESS!!! It was a rainy day on Saturday but it gave me a good excuse to start the re-assembly process. I spent some time thinking about all the parts and the best way to get things back together and the re-assembly went really well. I had the frame up on saw horses originally to mount the pedestle and hydraulic controls inside the dash, but soon I realized that the only way to get the rear end back in it was to put the tires on and roll it back together. This first pic was right after putting the rear end back in it.
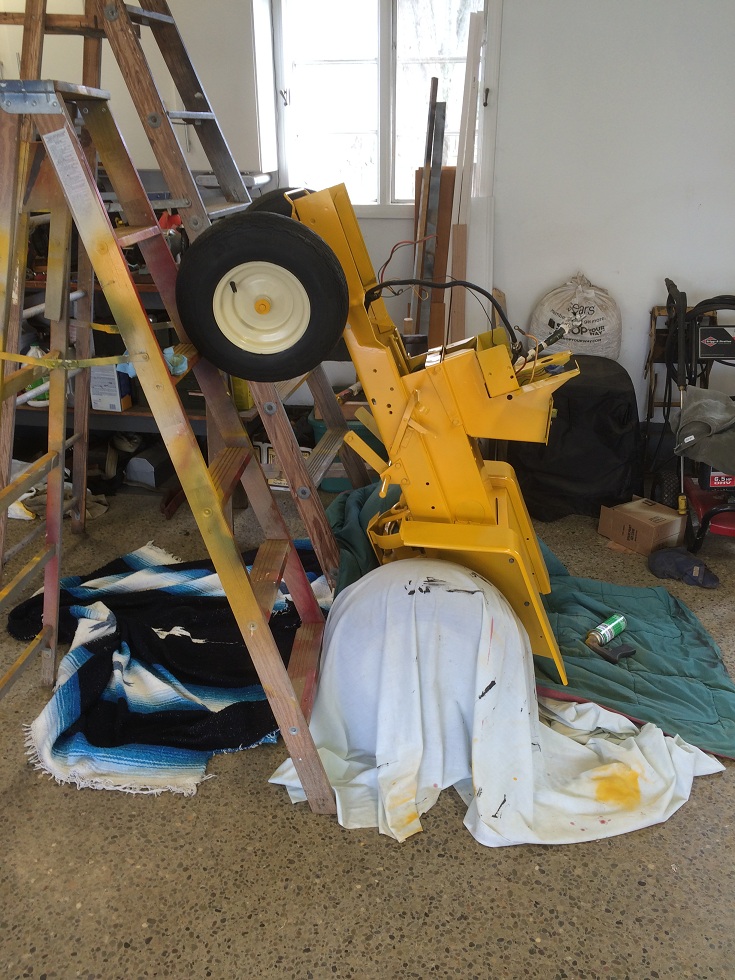
Being a hydro, and a "narrow frame" I thought a little more about laying under it to install the lift, steering column, and make all the hydro connections, and I devised the new "ladder" method. This turned out to be a real nice way to work on the underneath of the tractor. Just a couple of blocks behind the rear tires, and a pair of step ladders, and she sat there all day. This made it really easy to work underneath!
Today I was busy most of the day at a friend's house, so i really didn't make much more progress, but I did get the dash assembled and the steering column in prior to dropping it off the ladders. Now just the engine, grill, and the little odds and ends pieces. Hopefully, next week I'll have it running again!!
Later,
Bill