 to cool off.
This site uses cookies to maintain login information on FarmallCub.Com. Click the X in the banner upper right corner to close this notice. For more information on our privacy policy, visit this link: Privacy Policy
NEW REGISTERED MEMBERS: Be sure to check your SPAM/JUNK folders for the activation email.
Final Drive Removal
Forum rules
Notice: For sale and wanted posts are not allowed in this forum. Please use our free classifieds or one of our site sponsors for your tractor and parts needs.
Notice: For sale and wanted posts are not allowed in this forum. Please use our free classifieds or one of our site sponsors for your tractor and parts needs.
-
pete641
- 5+ Years

- Posts: 7
- Joined: Sun May 03, 2015 2:06 pm
- Zip Code: 60950
Final Drive Removal
Working on putting new brakes on my 154 and fixing a lot of leaks at the same time. My problem is that I can't get the final drive to come off. My guess is it's never been off since new. Any ideas for removal. Been beating on this thing all day. Figured I'd sit for a while and have a to cool off.
to cool off.-
seahaul
- 10+ Years

- Posts: 179
- Joined: Wed Dec 23, 2009 1:04 pm
- Zip Code: 28538
- Tractors Owned: LoBoy 185 with Woods mower
LoBoy 184 with Woods mower and 3-pt
LoBoy 184 with RM59-LB mower - Circle of Safety: Y
Re: Final Drive Removal
There are a couple of locator pins that usually have some rust on them that causes the final drive to be hard to separate from the differential case. Try squirting some solvent (Kroil, PB, etc) around the perimeter and let it soak in. Then you may have to drive a small wedge between the two halves to get it started. Be very careful driving a wedge however because these are cast iron parts and will chip or break easily. (By the way, the locator pins do not have to be removed. They are pressed into the holes to help align the bolt holes.)
Charlie
Charlie
-
pete641
- 5+ Years
- Posts: 7
- Joined: Sun May 03, 2015 2:06 pm
- Zip Code: 60950
Re: Final Drive Removal
Thanks, the left side came off with no problem. I left the right side to soak overnight, and today i'll soak it more before attempting it again. The brakes were shot on the left, luckily the drums are still good. I think the right was worse. 
-
pete641
- 5+ Years
- Posts: 7
- Joined: Sun May 03, 2015 2:06 pm
- Zip Code: 60950
Re: Final Drive Removal
OK, bigger issue with the removal of the final drive. Found out why it won't come off. Apparently, there was a broken bolt that I didn't see, thought the hole was just full of gunk. The problem is that I can't get at it to drill it out.
Any thoughts on removing this one?
Any thoughts on removing this one?
- Attachments
-
-
Eugene
- Team Cub Mentor

- Posts: 20378
- Joined: Fri Jul 02, 2004 9:52 pm
- Zip Code: 65051
- Circle of Safety: Y
- Location: Mo. Linn
Re: Final Drive Removal
Perhaps a small grinder to remove/grid off the offending part of the bolt.
I have an excuse. CRS.
-
gitractorman

- 10+ Years
- Posts: 2680
- Joined: Mon Oct 24, 2005 11:35 am
- Zip Code: 14072
- eBay ID: toysforjake
- Tractors Owned: Lots of Cub Cadets!
1951 Farmall Cub
1977 IH Cub
1966 IH Cub
1965 IH Lo Boy
1964 IH Lo Boy
1949 Farmall Cub
Several IH 154 Lo Boys
1979 IH 184 Lo Boy
Simplicity 4416 Sovereign
Simplicity Conquest
Simplicity Legacy 4x4 Diesel
Mitsubishi MT180D 4x4 Diesel - Circle of Safety: Y
- Location: Grand Island, NY
Re: Final Drive Removal
Where is that bolt? Is it possible to use an angle grinder to grind down some of the casting, leaving more of the bolt exposed, then weld a nut to the bolt?
Cub Cadets 682, 1811, 1864, Simplicity Legacy XL 4x4 Diesel with FEL, 60" mower, 50" Tiller
-
Bob McCarty
- Team Cub

- Posts: 11861
- Joined: Tue May 25, 2004 8:02 pm
- Zip Code: 80501
- Tractors Owned: Cubs, MH Pony, Shaw, Allis G, 1934 Silver King, JD LA and LI, Gibson D, David Bradley Tri-Trac
- Circle of Safety: Y
- Location: CO, Longmont
Re: Final Drive Removal
gitractorman wrote:Where is that bolt? Is it possible to use an angle grinder to grind down some of the casting, leaving more of the bolt exposed, then weld a nut to the bolt?
Can you post another picture that shows the location better?
Bob
"We don't need to think more,
we need to think differently."
-Albert Einstein
we need to think differently."
-Albert Einstein
-
Jim Becker
- Team Cub
- Posts: 17279
- Joined: Sun Feb 02, 2003 2:59 pm
- Zip Code: 55319
- Circle of Safety: Y
- Location: MN
Re: Final Drive Removal
If the whole bolt head is gone, you should be able to remove the final with the bolt in place. There may be a lot of rust in the bore of the bolt hole and on the stem of the bolt. A long soak in penetrating oil may help.
-
pete641
- 5+ Years
- Posts: 7
- Joined: Sun May 03, 2015 2:06 pm
- Zip Code: 60950
Re: Final Drive Removal
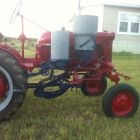
Been trying to grind out the bolt, still won't budge. This is the best image I can get to upload. The system keeps telling me the files are too large.
The hole on the right is the one I have been grinding out. Can only fit a Dremel in there. The bolt seems like it was welded in place. I can barely get a scraper to fit between the final and the spacer. I'm thinking I'll flip it on it's side and let it soak for a few days.
The hole on the right is the one I have been grinding out. Can only fit a Dremel in there. The bolt seems like it was welded in place. I can barely get a scraper to fit between the final and the spacer. I'm thinking I'll flip it on it's side and let it soak for a few days.
- Attachments
-
-
tmays
- 10+ Years
- Posts: 3414
- Joined: Wed May 11, 2011 8:59 pm
- Zip Code: 39154
- Tractors Owned: 1969 Farmall Cub
1952 Cub
1942 Farmall H - Location: Raymond, MS
-
pete641
- 5+ Years
- Posts: 7
- Joined: Sun May 03, 2015 2:06 pm
- Zip Code: 60950
Re: Final Drive Removal
I got all the broken bolts out, cleaned up all the threads. Cleaned the final drives, fixed all the leaks (I hope  ), and repainted the whole assembly, looks great. One problem I've run into is with the new brakes. Once I install the final drives onto the differential, the brakes seize up. Are there different size brake bands? I can turn the final drives with the brake bands on, when they are off the diff. Once I connect them, the brakes tighten up so much that the finals are frozen in place. Even the engine wouldn't turn them, I did have the whole thing back together at one point. From what I can tell there is only one way these will go on. Any thoughts? Am I doing something wrong?
-
- Similar Topics
- Replies
- Views
- Last post
-
-
Leaking bad from final drive…need help
by Ephillips2582 » Sat Jun 26, 2021 3:39 pm » in Lo-Boy Series - 154, 184, 185 - 8
- 731
-
by Ephillips2582
Fri Jul 02, 2021 9:33 pm
-
-
- 3
- 613
-
by yellowcub
Wed Mar 16, 2022 12:30 pm
-
-
PTO Shaft Removal on 184
by JacktheWindy » Mon Aug 28, 2023 9:42 pm » in Lo-Boy Series - 154, 184, 185 - 0
- 805
-
by JacktheWindy
Mon Aug 28, 2023 9:42 pm
-
-
-
Steering shaft removal 185
by Bronccat » Tue Jun 01, 2021 6:01 pm » in Lo-Boy Series - 154, 184, 185 - 9
- 647
-
by Bronccat
Sat Jun 05, 2021 9:39 am
-
-
- 7
- 202
-
by SONNY
Tue Apr 23, 2024 10:05 am
Return to “Lo-Boy Series - 154, 184, 185”
Who is online
Users browsing this forum: No registered users and 0 guests


