You might only have one mark, in fact the one pictured above only has the one mark.. My '48 only has one which is TDC on cylinder #1. Someone else that knows more will weigh in but I suspect the magneto ignitions only have one mark since the advance is built into the magneto.
You don't set the timing by "best run". Use the procedure in the manual to static time the magneto. It's a different kind of animal than a battery ignition.
Here is the procedure to install and time a magneto. Setting timing starts at step #6.
This site uses cookies to maintain login information on FarmallCub.Com. Click the X in the banner upper right corner to close this notice. For more information on our privacy policy, visit this link: Privacy Policy
NEW REGISTERED MEMBERS: Be sure to check your SPAM/JUNK folders for the activation email.
Setting Timing
Forum rules
Notice: For sale and wanted posts are not allowed in this forum. Please use our free classifieds or one of our site sponsors for your tractor and parts needs.
Notice: For sale and wanted posts are not allowed in this forum. Please use our free classifieds or one of our site sponsors for your tractor and parts needs.
-
MiCarl
- 5+ Years

- Posts: 581
- Joined: Sat Dec 16, 2017 8:28 am
- Zip Code: 48154
- Tractors Owned: 2021 RK25 "Barbie"
1944 Farmall H
1948 Farmall Cub (SOLD)
1994 Speedex 1631 - Circle of Safety: Y
- Location: Howell, MI
Re: Setting Timing
1944 Farmall H
1948 Farmall Cub
1994 Speedex 1631
1948 Farmall Cub
1994 Speedex 1631
-
Jim Becker
- Team Cub

- Posts: 17272
- Joined: Sun Feb 02, 2003 2:59 pm
- Zip Code: 55319
- Circle of Safety: Y
- Location: MN
Re: Setting Timing
MiCarl wrote:. . . I suspect the magneto ignitions only have one mark . . .
Exactly right, as is the rest of your post.
-
Glen

- 10+ Years

- Posts: 6139
- Joined: Mon Mar 19, 2012 7:33 pm
- Zip Code: 00000
- Tractors Owned: 1956 Farmall Cub with Fast Hitch, F-11 plow, Disc, Cultivator, Cub-22 mower
- Circle of Safety: Y
- Location: Wa.
Re: Setting Timing
Hi,
You haven't said if you have a magneto, which a 1949 Cub would have come with, or a Battery Ignition unit, which came out in 1950 on Cubs. Some Cubs with magnetos were changed to Battery Ignition over the years.
The 1949 Cub owner's manual shows only a magneto. It also shows how to time a magneto to the engine.
The 1955 or newer owner's manuals show both types, and how to time them to the engine.
IH changed to the front pulley with 2 timing marks after Battery Ignition came out.
A 1949 Cub had 1 timing mark.
You don't need the 2 marks for setting the timing. Both types of ignition use the TDC mark for setting the timing.
Below is the 1949 Cub owner's manual. The experts on here recommend people read it, it has lots of info about operation, maintenance, and lubrication. There is a table of contents on page 1.
The magneto info begins on page 30. There are pics, you can see if you have a magneto.
http://farmallcub.com/rudi_cub/www.clea ... index.html
Below is the 1955 Cub owner's manual, the Battery Ignition unit info begins on page 41.
http://farmallcub.com/rudi_cub/www.clea ... index.html
For the battery ignition unit, use a timing light, and set the timing to the TDC mark when the engine is running at 500 RPM.
If the timing light is 12 volts, you can run it with a 12 volt battery, if the Cub is 6 volts, then the light is brighter than using 6 volts.
The 2nd timing mark lets you see if the Battery Ignition unit spark advance is working, the timing should gradually advance as you speed up the engine, and be about to the 2nd mark, when the engine is at full speed.
-
WildFarmall
- 5+ Years
- Posts: 110
- Joined: Mon Jan 14, 2019 3:32 pm
- Zip Code: 28570
- Tractors Owned: Uncle Hubert - 1940 Farmall A
Aunt Elsie - 1949 Farmall Cub
Re: Setting Timing
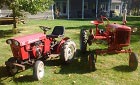
Now I am really confused. It is a 1949 Farmall Cub and when I got the tractor about 20 years ago it had already had a 12 volt battery system. Here is a picture. It has a distributer and a coil (internal resisted). I recently bought a crank but always used the 12 volt battery to start the tractor. What do I have? Where do I go from here?
- Attachments
-
-
WildFarmall
- 5+ Years
- Posts: 110
- Joined: Mon Jan 14, 2019 3:32 pm
- Zip Code: 28570
- Tractors Owned: Uncle Hubert - 1940 Farmall A
Aunt Elsie - 1949 Farmall Cub
Re: Setting Timing
Don't look too close at my paint job!
-
MiCarl
- 5+ Years
- Posts: 581
- Joined: Sat Dec 16, 2017 8:28 am
- Zip Code: 48154
- Tractors Owned: 2021 RK25 "Barbie"
1944 Farmall H
1948 Farmall Cub (SOLD)
1994 Speedex 1631 - Circle of Safety: Y
- Location: Howell, MI
Re: Setting Timing
That's not a magneto ignition. It's been converted to battery ignition and I believe the timing procedure will be different.
Hopefully someone familiar with those will notice and point you in the correct direction.
Hopefully someone familiar with those will notice and point you in the correct direction.
1944 Farmall H
1948 Farmall Cub
1994 Speedex 1631
1948 Farmall Cub
1994 Speedex 1631
-
Waif
- 5+ Years
- Posts: 1138
- Joined: Thu Aug 25, 2016 1:29 pm
- Zip Code: 49343
- Tractors Owned: 48 Farmall Cub "Seen Yore Dobbin"
53 F-Cub W/Loader. - Circle of Safety: Y
- Location: Michigan
Re: Setting Timing
Looks like a magneto was swapped out for a distributor. (?)
Glen has mentioned on a thread elsewhere in the past that might relate to your single notch (from being from a straight magneto set up originally Either the pulley or the ignition type was changed. Guessing the ignition system was , but I don't know that as a fact ).....That at low idle (475 r.p.m.) your pointer and the pulley mark should line up.
Then with throttle at/near top of range the pulley shows the advance about a half inch beyond t.d.c. mark.
If I read it right...
viewtopic.php?t=97092
-
WildFarmall
- 5+ Years
- Posts: 110
- Joined: Mon Jan 14, 2019 3:32 pm
- Zip Code: 28570
- Tractors Owned: Uncle Hubert - 1940 Farmall A
Aunt Elsie - 1949 Farmall Cub
Re: Setting Timing
Glen wrote:Hi,
You haven't said if you have a magneto, which a 1949 Cub would have come with, or a Battery Ignition unit, which came out in 1950 on Cubs. Some Cubs with magnetos were changed to Battery Ignition over the years.
The 1949 Cub owner's manual shows only a magneto. It also shows how to time a magneto to the engine.
The 1955 or newer owner's manuals show both types, and how to time them to the engine.
IH changed to the front pulley with 2 timing marks after Battery Ignition came out.
A 1949 Cub had 1 timing mark.
You don't need the 2 marks for setting the timing. Both types of ignition use the TDC mark for setting the timing.
Below is the 1949 Cub owner's manual. The experts on here recommend people read it, it has lots of info about operation, maintenance, and lubrication. There is a table of contents on page 1.
The magneto info begins on page 30. There are pics, you can see if you have a magneto.
http://farmallcub.com/rudi_cub/www.clea ... index.html
Below is the 1955 Cub owner's manual, the Battery Ignition unit info begins on page 41.
http://farmallcub.com/rudi_cub/www.clea ... index.html
For the battery ignition unit, use a timing light, and set the timing to the TDC mark when the engine is running at 500 RPM.
If the timing light is 12 volts, you can run it with a 12 volt battery, if the Cub is 6 volts, then the light is brighter than using 6 volts.
The 2nd timing mark lets you see if the Battery Ignition unit spark advance is working, the timing should gradually advance as you speed up the engine, and be about to the 2nd mark, when the engine is at full speed.
Thanks so much Glen. It seems that my tractor was converted to a 12 volt Battery Ignition unit. I do not have a timing light but I do have an old dwell meter that I have never used.
-
ShawnAgne

- 5+ Years
- Posts: 846
- Joined: Sat May 07, 2016 5:13 pm
- Zip Code: 45380
- Tractors Owned: 1952 Cub w/ 184 motor (Kid)
12V with Petronix
IH 3160 Mower Deck
54 Leveling Blade
193 Plow
IH528 Trailer
Front/Rear Weights
1955 Farmall 300 (Clarence)
12V with Petronix
Woods L306 72"
1955 Farmall 100 (Thomas)
12V with Petronix
Woods L59 60"
A60 Leveling Blade
Front/Rear Weights - Circle of Safety: Y
- Location: Versailles, Ohio
Re: Setting Timing
WildFarmall wrote:Now I am really confused. It is a 1949 Farmall Cub and when I got the tractor about 20 years ago it had already had a 12 volt battery system. Here is a picture. It has a distributer and a coil (internal resisted). I recently bought a crank but always used the 12 volt battery to start the tractor. What do I have? Where do I go from here?
If I wouldn't know better I'd think I was looking at my Cub LOL.
Anyways here is how I did both of mine, going form memory so I may have forgotten something.
Pull plug #1. Use the hand crank and find TDC. Using a timing light adjust the distributor till it comes on. I then started the motor and then hand dialed in the distributor based on sound and locked it down. Remember though if you go on sound it is sometimes advanced to far, so when I got it sounding right I backed it off a little. I didn't move either one very much but I did move them some. Worked for both Cub and 300.
I set the timing before I converted it to electronic and 12V so after I converted them I just adjusted it by hand slightly.
Shawn Agne
-
Jim Becker
- Team Cub
- Posts: 17272
- Joined: Sun Feb 02, 2003 2:59 pm
- Zip Code: 55319
- Circle of Safety: Y
- Location: MN
Re: Setting Timing
Just static time it using the procedures in the '55 Owner's Manual.
-
MiCarl
- 5+ Years
- Posts: 581
- Joined: Sat Dec 16, 2017 8:28 am
- Zip Code: 48154
- Tractors Owned: 2021 RK25 "Barbie"
1944 Farmall H
1948 Farmall Cub (SOLD)
1994 Speedex 1631 - Circle of Safety: Y
- Location: Howell, MI
Re: Setting Timing
Jim Becker wrote:Just static time it using the procedures in the '55 Owner's Manual.
I just read the procedure and have to say with modern tools there has to be an easier way to do it. My proposal below:
1) Disconnect the battery.
2) Make sure the points are properly gapped.
3) Disconnect the primary coil lead from the distributor (that's the one on the side of the distributor, behind the wire with the yellow tape on it in your picture.
4) Loosen the distributor mounting bolts just enough you can rotate it. Turn the top toward the engine as far as it will go.
5) Use your crank to position the timing mark on the pulley in line with the pointer.
6) Set your multimeter to continuity test. (If you don't have one get one. They're cheap and invaluable for someone who is doing his own wrenching). Attach one multimeter lead to the primary post on the side of the distributor and the other to a good ground. The meter should indicate continuity (I like the kind that sounds a tone).
7) Rotate the top of the distributor away from the engine just until continuity is broken. This is what causes the coil to fire and you've just set it to fire at TDC at 0 RPM.
9) Reconnect the coil and battery.
The tractor should now run. Ideally you'd do the verification check from the manual to make sure it isn't firing early. The manual repeatedly warns to be careful it doesn't fire before TDC. I suspect this is so it doesn't kick back starting with the hand crank.
The manual goes on to say run it at high idle and check with a timing light that it's at 16 degrees before TDC at high idle. You're not going to be able to do that with the pulley as is. You could replace the pulley which seems to be a major undertaking or do some measuring and add your own BTDC mark. Personally if it runs well and has good power I wouldn't bother.
Last edited by MiCarl on Tue Mar 26, 2019 11:39 am, edited 2 times in total.
1944 Farmall H
1948 Farmall Cub
1994 Speedex 1631
1948 Farmall Cub
1994 Speedex 1631
-
WildFarmall
- 5+ Years
- Posts: 110
- Joined: Mon Jan 14, 2019 3:32 pm
- Zip Code: 28570
- Tractors Owned: Uncle Hubert - 1940 Farmall A
Aunt Elsie - 1949 Farmall Cub
Re: Setting Timing
MiCarl wrote:Jim Becker wrote:Just static time it using the procedures in the '55 Owner's Manual.
I just read the procedure and have to say with modern tools there has to be an easier way to do it. My proposal below:
1) Disconnect the battery.
2) Make sure the points are properly gapped.
3) Disconnect the primary coil lead from the distributor (that's the one on the side of the distributor, behind the wire with the yellow tape on it in your picture.
4) Loosen the distributor mounting bolts just enough you can rotate it. Turn the top toward the engine as far as it will go.
5) Use your crank to position the timing mark on the pulley in line with the pointer.
6) Set your multimeter to continuity test. (If you don't have one get one. They're cheap and invaluable for someone who is doing his own wrenching). Attach one multimeter lead to the primary post on the side of the distributor and the other to a good ground. The meter should indicate continuity (I like the kind that sounds a tone).
7) Rotate the top of the distributor away from the engine just until continuity is broken. This is what causes the coil to fire and you've just set it to fire at TDC at 0 RPM.Tighten the distributor down.
9) Reconnect the coil and battery.
The tractor should now run. Ideally you'd do the verification check from the manual to make sure it isn't firing early. The manual repeatedly warns to be careful it doesn't fire before TDC. I suspect this is so it doesn't kick back starting with the hand crank.
The manual goes on to say run it at high idle and check with a timing light that it's at 16 degrees before TDC at high idle. You're not going to be able to do that with the pulley as is. You could replace the pulley which seems to be a major undertaking or do some measuring and add your own BTDC mark. Personally if it runs well and has good power I wouldn't bother.
Thanks so much! This makes sense to me! I have a multimeter and will do it. I appreciate the advice.
-
Jim Becker
- Team Cub
- Posts: 17272
- Joined: Sun Feb 02, 2003 2:59 pm
- Zip Code: 55319
- Circle of Safety: Y
- Location: MN
Re: Setting Timing
Your procedure only takes you through the first paragraph of page 44. All the verification remains. I think you have the rotation backwards. Rotating the top of the distributor towards the engine advances the timing. If you want to use a multimeter, you can simplify:
1) Skip that step.
2) Check and set the point gap.
3) Skip this step.
4) Loosen the distributor bolts so it can be rotated.
5) Crank the engine to the TDC marker (the second if there are 2 notches).
6) Set the multimeter to voltage test. Attach one lead to the post on the side of the distributor and the other to ground. Turn on the ignition switch. Meter should read either battery voltage or zero.
7) If the meter reads voltage, rotate clockwise until it reads zero. Then rotate counterclockwise until you read battery voltage.
8 ) Tighten the distributor down.
9) Shut the ignition switch off.
Of course. if you don't have the multimeter you can skip everything about it. Just rotate the distributor clockwise until you see discharge on the ammeter. Then rotate counterclockwise until the coil throws a spark. Oh, wait, we're back to what the Owner's Manual said.
-
Dale Finch

- 10+ Years
- Posts: 6677
- Joined: Tue Apr 27, 2010 11:34 am
- Zip Code: 27517
- Tractors Owned: '51 Cub #140966 "Bruno" with Woods 59 mower
'55 Cub #187541 "Betty" with Fast Hitch
'55 Cub #190482 "Ben" with Woods 42 mower
'55 Cub #191739 "Bertha" with Woods 42 mower
'56 Cub #194370 "Boris" with Mott Flail mower - Circle of Safety: Y
- Location: NC, Chapel Hill

-
MiCarl
- 5+ Years
- Posts: 581
- Joined: Sat Dec 16, 2017 8:28 am
- Zip Code: 48154
- Tractors Owned: 2021 RK25 "Barbie"
1944 Farmall H
1948 Farmall Cub (SOLD)
1994 Speedex 1631 - Circle of Safety: Y
- Location: Howell, MI
Re: Setting Timing
Jim Becker wrote:Your procedure only takes you through the first paragraph of page 44. All the verification remains. I think you have the rotation backwards. Rotating the top of the distributor towards the engine advances the timing. If you want to use a multimeter, you can simplify:
1) Skip that step.
2) Check and set the point gap.
3) Skip this step.
4) Loosen the distributor bolts so it can be rotated.
5) Crank the engine to the TDC marker (the second if there are 2 notches).
6) Set the multimeter to voltage test. Attach one lead to the post on the side of the distributor and the other to ground. Turn on the ignition switch. Meter should read either battery voltage or zero.
7) If the meter reads voltage, rotate clockwise until it reads zero. Then rotate counterclockwise until you read battery voltage.
8 ) Tighten the distributor down.
9) Shut the ignition switch off.
Of course. if you don't have the multimeter you can skip everything about it. Just rotate the distributor clockwise until you see discharge on the ammeter. Then rotate counterclockwise until the coil throws a spark. Oh, wait, we're back to what the Owner's Manual said.
I think I have the rotation correct. Isn't there an idler gear that causes the rotor to turn the same direction as the engine?
The whole reason I wrote up the procedure the way I did was because it can be done from one spot rather than trying to be two places on the tractor at once.
Using voltage will work but requires watching the meter to do the job. With a tone continuity checker hands and eyes can be on the distributor rather than the meter.
1944 Farmall H
1948 Farmall Cub
1994 Speedex 1631
1948 Farmall Cub
1994 Speedex 1631
Who is online
Users browsing this forum: Crimson Tim and 60 guests


