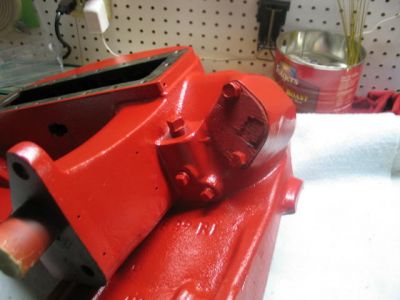

I have been playing with my hydraulic project trying to become somewhat learned in this arcane art, which so far has eluded me. But, with Rick's help, I am getting there. In fact, I actually had Ellie up and running yesterday after I finally got the nerve to remove the manifold and put in the by-pass block. For those of you who are mechanically inclined/experienced, this may not seem like much of a big deal, but I am NOT by any stretch of the imagination a mechanic, much less a backyard mechanic. So stuff like this is like trying to talk to my nephew.. (he is Greek btw... and his english is as bad as my Greek), yeah, Greek to me
After struggling with getting the manifold lined up, and the bolts all threaded etc., I checked all of my connections, double checked with Rick to make sure that I wouldn't deadend the system and destroy my Touch Control and Hydraulic Pump, thereby necessitating a complete engine rebuild...
Eureka
Then comes the
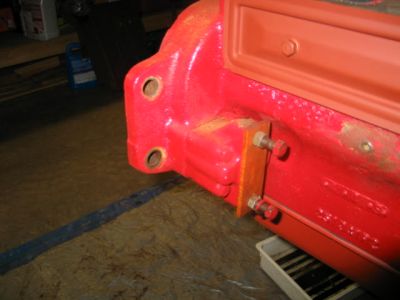
I accidentially hit the lever for the Cessna Valve. I effectively deadended the system. I hear a huge POP, and immediately witnessed this fierce stream of Hy-Tran
 blowing out toward the front of Ellie.
I thought for sure I killed her
Thankfully this is what happened:
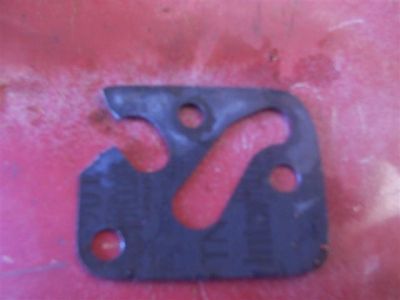
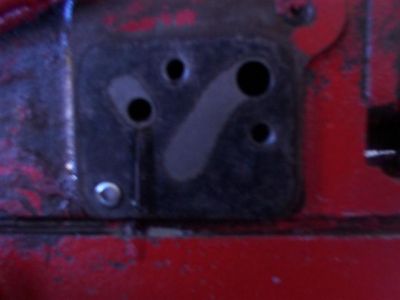
I blew the side out of the gasket
Rick helped again. He explained to me what I had inadvertantly done. I called Princess and ordered up a foot long jumper to complete the circuit and prevent accidental deadending in the future.
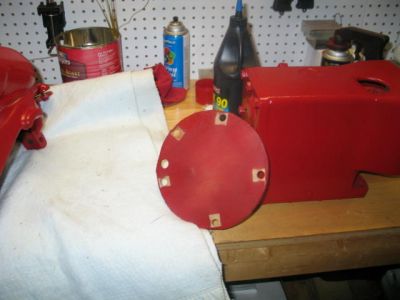
Then, I proceeded to redo the gaskets. All went well.Learned that it is far easier to take the Hydraulic Pump bolts out versus wrestling with the manifold trying to line everything up. This time it took me about 10 minutes to replace the gaskets instead of the hour it took me last night as I wrestled with the lines, manifold, by-pass block, 2 gaskets and 3 bolts. Whew.. tuckers me out just thinking about it. Got it all together. As I was tightening up the 3rd and last bolt in the manifold and just prior to getting the nerve to fire her up again,
This is what I now have to play with....
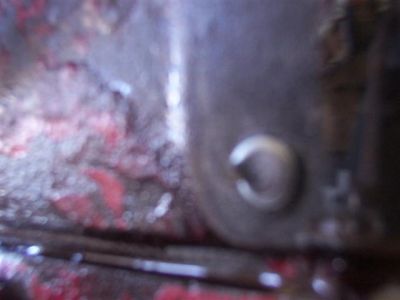
So, I guess the next step is to find the EXACT center of the shorn bolt, punch and very, very carefully drill it out. And cross my fingers that I do not screw this up again.....
Dang, it ain't no fun when you do stoooopid stuff
More pics at 11 or whenever I get this fixed..