
The processes of weathering and wear during a period of several decades takes its toll on the condition of the wheel. But with minimal effort, you can restore much of its original appearance.
The first step in the process is removing the wheel from the steering shaft. Heat and penetrant may be needed to loosen the nut. Following its removal , similar applications of heat and penetrant should facilitate removal of the wheel from the shaft. If additional persuasion is necessary, a puller may be used or the hub of the wheel may be tapped gently on the lower side to break the bond of rust between the hub and shaft.
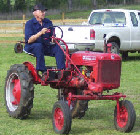
We will use the following to demonstrate the process of rebuilding a steering wheel.
Specific problems which we would want to correct include:
A. Discoloration of hands from contact with oxidized rubber rim of wheel.
B. Rust on metal components.
C. Cracks in rubber covering of rim.
D. Gaps (missing segments) in rubber component.
CLEANING THE WHEEL
A few basic supplies are needed. These are inexpensive items commonly used in the house or in the shop:
- Dishwashing Detergent
- Steel Wool
- Sanding Sponge
- Small Brushes
Method:
Wash the entire unit in a warm solution of dishwashing detergent. A small brush provides access into cracks and other hard to reach areas. In addition to removing dirt and grime, this will also remove oil , creating dry surfaces which enable JB Kwik Weld and paint to adhere to the wheel. When dry, sand the rim of the wheel with medium to fine steel wool. Continue this action until the oxidized layer of rubber is gone and the rim has a uniform black appearance. Wash again with the detergent solution and let dry. Use a sanding sponge to remove rust from the metal hub and spokes. Wash the wheel with detergent solution.
MAKING REPAIRS
Again, just a few basic supplies are needed, mostly things that would be common in your shop.
- Sanding Sponge
- JB Weld Kwik Weld
- Toothpicks
- Small Paper Pad
- Brush
Method:
After the steering wheel has been cleaned and allowed to dry, check the margins of each crack in the rubber. If edges are elevated, sand lightly to reduce elevation. Mix the two components of JB Kwik Weld mix according to the manufacturer's directions. The JB Kwik Weld hardens in four minutes so mix in small quantities. Mix no more than what you can safely use before it has time to tack up and taking care not to get it all over the place. Use toothpicks to place the Weld mixture in the cracks.
After the JB Weld had dried and cured, (again, manufacturer's directions would apply), for all of your repairs, it is time to prep for painting. Allow up to four hours drying time, then sand to remove excess Kwik Weld. Repeat this process until each crack or gap is filled and the contours in cracked regions match those of the rubber. Brush lightly following sanding to clean the area. Spray each area lightly with gloss black paint. This enables minor imperfections to be detected and corrected.
Painting
Method:
Spray paint the rubber rim. You can spray the spokes and hub as well, using the black as a primer coat. (I used Krylon Gloss Black). Allow to dry. Then top coat with Plasti-Kote. The steering wheel is already showing much improvement.
The next step is to mask the steering wheel rim itself and prep for painting the hub and spokes 2150 Red, or Federal Yellow as the case would be. Mask the rim using strips of paper or other suitable material securing with good painter's masking tape.
Spray paint the metal hub and spokes the appropriate color, probably 2 coats would be sufficient. Allow to dry and cure. Remove masking. And voila
The process is now complete, no rust, no cracks, no gaps.
This steering wheel is now ready to put on your Cub providing several years of trouble free use. And


