My latest acquisition has some bent and wrinkled sheet metal, especially the grille.
While I could leave it as-is, I'd sure like to straighten it out somehow. I was thinking of banging on it with a dead-blow mallet, but something tells me I'd only thin and stretch the metal out like a pie crust.
Also the grille has a lot of small sheet metal cross-ribs that need to be straightened out and I can't picture how to do that...
Any suggestions?
This site uses cookies to maintain login information on FarmallCub.Com. Click the X in the banner upper right corner to close this notice. For more information on our privacy policy, visit this link: Privacy Policy
NEW REGISTERED MEMBERS: Be sure to check your SPAM/JUNK folders for the activation email.
How to straighten sheet metal?
Forum rules
Notice: For sale and wanted posts are not allowed in this forum. Please use our free classifieds or one of our site sponsors for your tractor and parts needs.
Notice: For sale and wanted posts are not allowed in this forum. Please use our free classifieds or one of our site sponsors for your tractor and parts needs.
-
allenlook

- Cub Pro

- Posts: 1795
- Joined: Sat Jul 31, 2004 10:37 pm
- Zip Code: 12020
- Location: NY, Saratoga Springs
How to straighten sheet metal?
Searchable Cub Parts Database and Manual Galleries at www.farmallcub.info - Computerized Carving at www.bitcarving.com
-
Don McCombs

- Team Cub Mentor

- Posts: 17507
- Joined: Mon Feb 03, 2003 6:45 am
- Zip Code: 21550
- Tractors Owned: "1950 Something" Farmall Cub
1957 Farmall Cub w/FH
1977 International Cub w/FH
1978 International Cub
1948 Farmall Super A - Circle of Safety: Y
- Location: MD, Deep Creek Lake

-
l5foye
- 10+ Years

- Posts: 32
- Joined: Mon Mar 28, 2005 7:52 pm
- Location: N. Ireland
-
Patbretagne
- Cub Pro
- Posts: 1051
- Joined: Mon Apr 04, 2005 6:45 am
- Zip Code: 00000
- Location: Finistère Bretagne France
l5foye wrote:Can you post a photo of what needs work? To avoid stretching metal, normally you use a shrinking hammer - the head of which is serrated.
Tell more, this is very interesting, something I have avoided doing as I always seem to have a bump when I've finished flattening some sheet metal, I have a feeling that I am not alone????
Pat
-
George Willer

- Cub Pro
- Posts: 7013
- Joined: Sun Feb 02, 2003 9:36 pm
- Zip Code: 43420
- Circle of Safety: Y
- Location: OHIO, Fremont
Pat,
Right now I'm in the process of making a hood for Rambo from a junk hood. I've welded a lot of stray holes that have been drilled for no known reason, and have welded a bunch of cracks and replaced the missing front brackets. I've also replaced the metal someone has cut away in the worst possible side of the radiator neck. I have nearly all the paint removed and am looking towards the final straightening of the many dents. There are a number of areas that will require shrinking the metal. I intend to do it with the torch.
Heating any small area to red hot, and straightening any resulting bulge will result in shrinkage when it cools. The technique requires heating a very small pinpoint to red and moving on to another in the same general area. It may result in too much shrinkage, but we know how to deal with that... work it "on dolly" until it is straight.
George Willer
http://gwill.net
The most affectionate creature in the world is a wet dog. Ambrose Bierce
http://gwill.net
The most affectionate creature in the world is a wet dog. Ambrose Bierce
-
Jim Becker
- Team Cub

- Posts: 17291
- Joined: Sun Feb 02, 2003 2:59 pm
- Zip Code: 55319
- Circle of Safety: Y
- Location: MN
George Willer wrote:It may result in too much shrinkage, but we know how to deal with that... work it "on dolly" until it is straight.
George just barely touched on a key concept. Working "on the dolly" is the use of a back up block directly behind the point you are hammering on. This technique stretches the metal. Working "off the dolly" is done by putting the back up behind a low spot while hammering on a high spot.
I don't know what I am doing straightening metal. But I can fake it well enough to fool the mildly observant. The little I know all came from reading a book "The Key to Metal Bumping" by Frank Sargent, third edition, 1953. Get a copy, read it and do what it says. You will be surprised how much you can do.
I got a copy from Eastwood a few years back. Eastwood still has it listed but Amazon lists it as out of print.
-
Patbretagne
- Cub Pro
- Posts: 1051
- Joined: Mon Apr 04, 2005 6:45 am
- Zip Code: 00000
- Location: Finistère Bretagne France
-
Bus Driver

- 10+ Years
- Posts: 2917
- Joined: Sat Feb 11, 2006 5:26 pm
- Location: NC
Do a lot of looking before using the hammer and dolly. The best process involves moving the metal in exactly the opposite sequence to the process of creating the dent or bend. The outer edges of the dent were formed last, so start at the point that you believe bent last- the perimeter. work inward to the point of first impact. Use gentle blows, harder blows can come later if necessary.
Luck favors those who are prepared
-
Jim Becker
- Team Cub
- Posts: 17291
- Joined: Sun Feb 02, 2003 2:59 pm
- Zip Code: 55319
- Circle of Safety: Y
- Location: MN
Bus Driver wrote:The best process involves moving the metal in exactly the opposite sequence to the process of creating the dent or bend.
This makes a big difference in how easy and how well the damage comes out. (It's in the book.) To add a bit to this, a lot of dents are the result of a glancing blow that forms a crease. Always start at the newer end of the crease. If you look at a craese caused by a blow from left to right, the metal will be pushed to the right. So start at the right end and work to the left.
-
Harold R
- Team Cub Guide
- Posts: 3280
- Joined: Thu Feb 20, 2003 4:54 pm
- Zip Code: 71203
- Tractors Owned: 1948,55, and 56 Farmall Cubs.
- Circle of Safety: Y
- Location: Louisiana
-
Psycho

- 10+ Years
- Posts: 162
- Joined: Mon Mar 06, 2006 3:35 pm
- Location: Westchester, NY
Sorry,
I read this one a little late. These guys covered it pretty well. I'm no pro, by any stretch of the imagination, but what I've learned, I learned by doing it wrong the first time. I started out with one of the simple bodywork kits you can find almost anywhere(2 or three hammers, and an assortment of dollies). I've learned that less is always better with a hammer and dolly. You can always hit a little more later, but overdoing it is harder to correct. Have fun with it. If it's getting frustrating, put it down and go have a coffee or something. Come back later, it will still be there. The key is to have fun Would like to see pic's of what you're working on.
Bob
I read this one a little late. These guys covered it pretty well. I'm no pro, by any stretch of the imagination, but what I've learned, I learned by doing it wrong the first time. I started out with one of the simple bodywork kits you can find almost anywhere(2 or three hammers, and an assortment of dollies). I've learned that less is always better with a hammer and dolly. You can always hit a little more later, but overdoing it is harder to correct. Have fun with it. If it's getting frustrating, put it down and go have a coffee or something. Come back later, it will still be there. The key is to have fun
Bob
-
allenlook
- Cub Pro
- Posts: 1795
- Joined: Sat Jul 31, 2004 10:37 pm
- Zip Code: 12020
- Location: NY, Saratoga Springs
Well...
Fantastic info guys, thank you!
I took some pictures today and will post shortly - from your description I have the "hood from hell" and there is no chance that it will be restorable with hand-hammering. I also have the "grille from hell" to back it up.
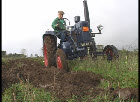
By the different bends in the muffler and air cleaner cap, and in the hood and grille itself, I think a tree or something landed across the hood of the tractor and the previous owner unleashed a pack of gnomes with hammers to beat out the dents.
I took some pictures today and will post shortly - from your description I have the "hood from hell"
By the different bends in the muffler and air cleaner cap, and in the hood and grille itself, I think a tree or something landed across the hood of the tractor and the previous owner unleashed a pack of gnomes with hammers to beat out the dents.
Searchable Cub Parts Database and Manual Galleries at www.farmallcub.info - Computerized Carving at www.bitcarving.com
-
allenlook
- Cub Pro
- Posts: 1795
- Joined: Sat Jul 31, 2004 10:37 pm
- Zip Code: 12020
- Location: NY, Saratoga Springs
Bent sheet metal
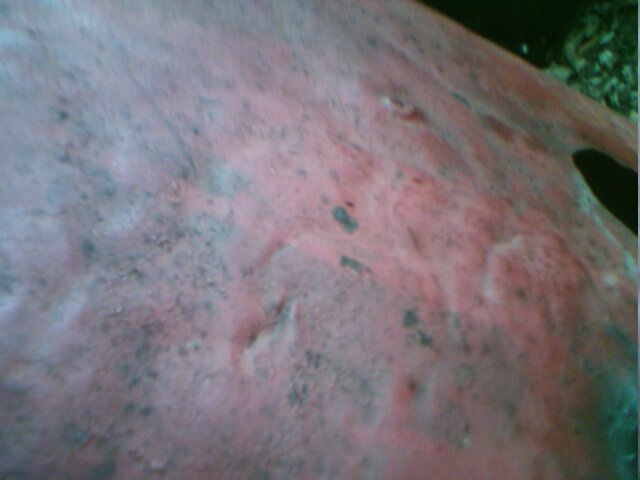
OK, here's the pictures of the hood and the grille. Looks like I have several problems...
First - the previous owner cut the radiator hole very oversize...
Second - the rest of the grille is in rough shape.

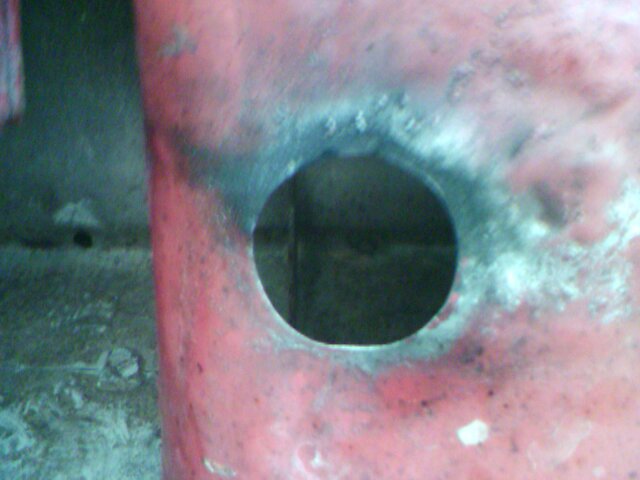
Third - the exhaust hole is similarly crude.
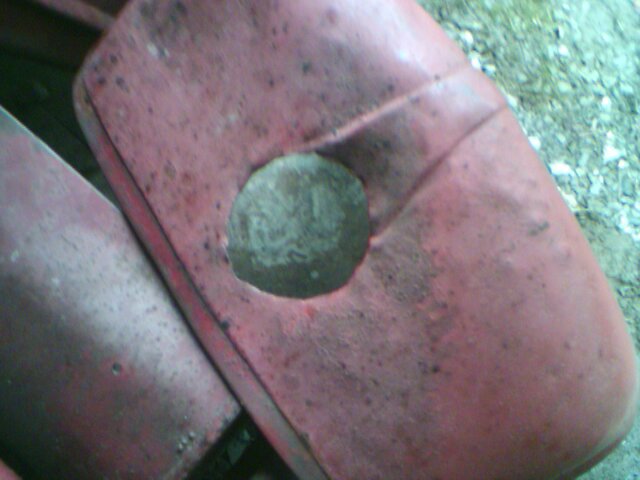
Fourth - I have this bump and hole in the hood.
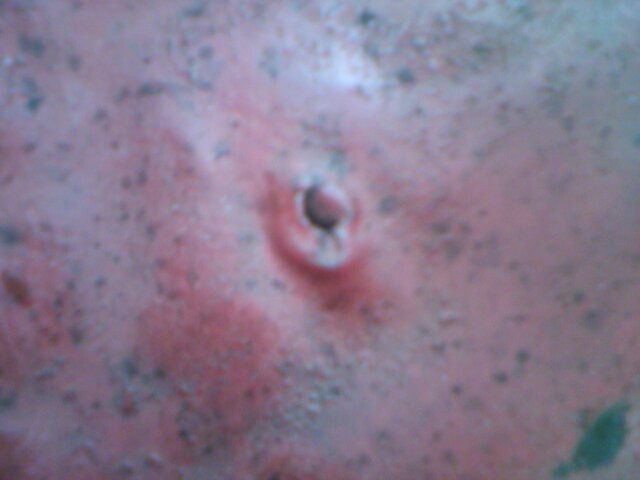
Fifth - most of the hood has what looks like "metal acne."
First - the previous owner cut the radiator hole very oversize...
Second - the rest of the grille is in rough shape.
Third - the exhaust hole is similarly crude.
Fourth - I have this bump and hole in the hood.
Fifth - most of the hood has what looks like "metal acne."
Searchable Cub Parts Database and Manual Galleries at www.farmallcub.info - Computerized Carving at www.bitcarving.com
-
Patbretagne
- Cub Pro
- Posts: 1051
- Joined: Mon Apr 04, 2005 6:45 am
- Zip Code: 00000
- Location: Finistère Bretagne France
-
- Similar Topics
- Replies
- Views
- Last post
-
- 6
- 346
-
by baldwindiesel
Wed Mar 08, 2023 3:58 pm
-
-
'48 Cub -metal parts in oil pan Attachment(s)
by phill_mi » Sun Jun 19, 2022 5:42 pm » in Farmall Cub - 19
- 490
-
by inairam
Wed Jun 22, 2022 9:35 am
-
-
-
Bondo still the Best option for pitted metal?
by Bennydh » Mon Oct 24, 2022 4:05 pm » in Farmall Cub - 9
- 473
-
by Urbish
Wed Oct 26, 2022 10:35 am
-
-
-
Is there 'yellow metal' in the steering assembly?
by phill_mi » Sun Mar 27, 2022 7:09 pm » in Farmall Cub - 3
- 306
-
by phill_mi
Tue Mar 29, 2022 5:44 pm
-
Who is online
Users browsing this forum: No registered users and 3 guests


